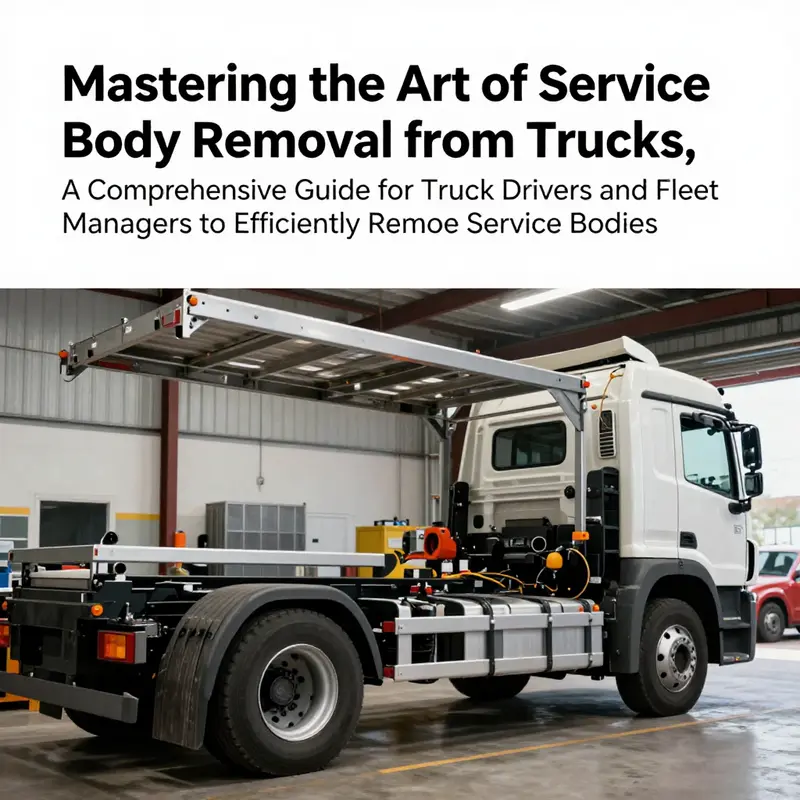
Removing a service body from a truck is an essential skill for long-haul truck drivers, trucking company owners, fleet managers, and truck maintenance specialists. Whether it’s for maintenance, upgrades, or vehicle sales, understanding the proper techniques for this task can enhance operational efficiency and prolong the lifespan of your truck. This guide will walk you through each critical step: preparing the truck, disconnecting electrical systems, handling fasteners and mounting hardware, safely lifting the service body, and inspecting the truck frame post-removal. Each chapter is designed to equip you with the knowledge and confidence necessary to execute this process smoothly and effectively.
Foundations Before the Lift: Thorough Preparation for Removing a Service Body from a Truck
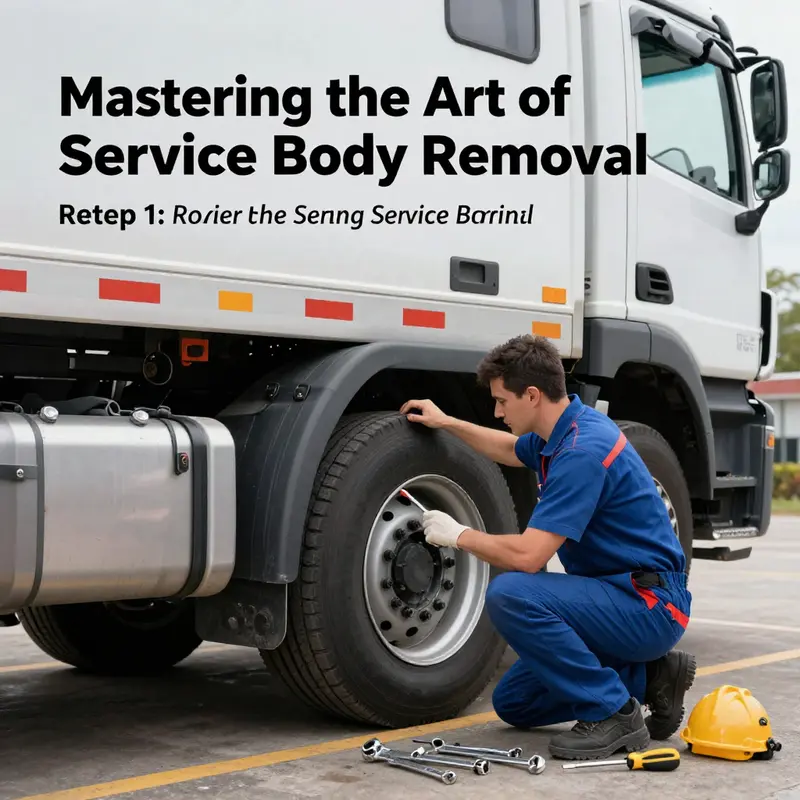
Removing a service body from a truck begins long before the first bolt is loosened. It starts with a safety-first mindset, a deliberate workspace setup, and a plan that respects weight, balance, and mounting hardware. With a solid foundation, the removal becomes a controlled sequence rather than a rushed or improvised event.
Choosing the right location is the first practical decision. A flat, solid, and spacious area reduces the chance of movement or tipping as components are freed. A level surface keeps jacks, stands, and tools stable, while ample space around the truck prevents accidental contact with nearby objects. Adequate lighting is essential so screws, bolts, and wiring are clearly visible. The ground should be dry and free of oil or loose gravel that could undermine stability. Avoid slopes or soft ground, since these conditions can shift under load as the body separates.
The integrity of the tools and equipment is the next line of defense. A thorough equipment check is required. If a hydraulic jack or pneumatic lift is used, verify its load capacity matches the body’s weight plus a safety margin. Inspect for wear, deformation, or oil leaks. Hand tools should be correct size and free from damage. Spare bolts, nuts, and brackets that match the mounting hardware help keep the removal sequence uninterrupted. Clean blocks and sturdy jack stands should be ready to distribute load and prevent point loading during detachment. A tidy toolkit reduces time spent hunting for tools and reduces the risk of dropping the body during the final release.
Securing the vehicle is the guardrail that keeps everything in place as work begins. Wheel chocks prevent the truck from moving, even on a level surface. Engage the parking brake and consider additional restraints at the wheels for larger trucks. Use cribbing or stands to create a stable platform for the truck once the body begins to lift. The service body can shift as fasteners release, so plan for stability beyond the wheels. Safety gloves, eye protection, and a hard hat are prudent when working around sharp edges or partially detached components. A calm, controlled environment keeps the operation predictable.
An initial inspection of the service body is critical. Before loosening anything, examine how the body is attached to the chassis. Identify mounting points—bolts, brackets, or rivets—that connect the body to the frame. Check the condition and position of securing hardware. Corrosion, fatigue, or misalignment can complicate or prevent a clean removal. Photos or sketches of the mounting layout help build a reliable removal sequence and serve as a reference for reinstallation.
The electrical systems connected to the service body cannot be neglected. If the body contains lights, outlets, sensors, or control circuits, label connectors and note their locations. When disconnecting, power down the battery to minimize shorts or shocks. If the body includes any refrigeration, hydraulics, or powered lifting mechanisms, ensure controls are de-energized and locked out per safety protocol. The aim is a clear, documented separation between body electrics and vehicle chassis so subsequent steps can proceed without tangled cables.
A practical removal plan grows from careful observation. Outline the removal sequence to minimize risk to the frame and body. Start with the least obstructed connections and work toward the most integrated ones as the body loosens. Keep notes or a checklist for each fastening point as it’s released to avoid missing pieces during reassembly.
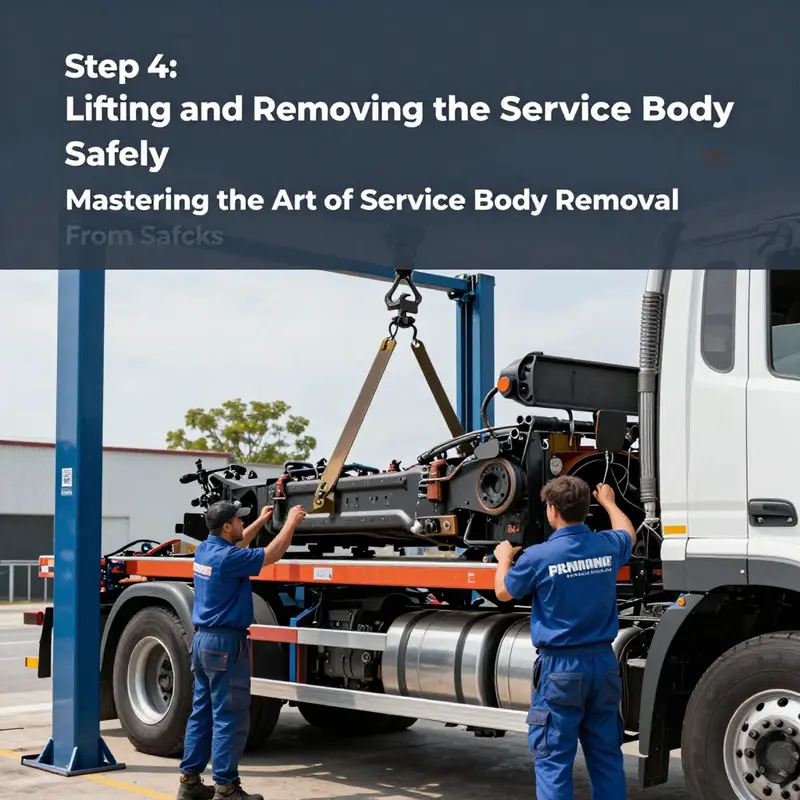
In preparation for the lift, consider how the body will be supported during the mid-lift moment. The final lowering requires a safe, synchronized release of fasteners while the body is supported by a hoist, jack, or winch. A dedicated observer can monitor fit and clearance while another manages the lifting device. If the body is aluminum, fiberglass, or steel, be mindful of different tolerances and potential flexing.
Incorporating practical knowledge from maintenance and safety disciplines can help guide this work. Seek a reputable maintenance or safety reference for structured guidance. While this is not a product pitch, solid training underpins every safe operation, including service body removal.
The preparations here do not replace the manufacturer’s manual. They complement it by helping the operator understand broader safety context and the practical realities of lifting heavy enclosures. If the exact steps vary by model, the same core principles apply: set a stable stage, secure the platform, protect the electrical and hydraulic interfaces, and proceed with a well-illuminated, carefully staged sequence. The better you prepare, the more predictable and efficient the removal will be. When you finally loosen the last fastener and the body begins to separate, you should feel the calm confidence that planning yields to action.
Finally, remember that steps and safety considerations will vary with the truck model and the type of service body attached. Always reference the manufacturer’s manual for model-specific guidance before you begin. If you’re unsure about your capabilities, seek professional help. The focus here is universal: to build the confidence and capability to approach the removal with a clear plan, the right tools, and a sustained commitment to safety.
Safely Severing Power: The Essential Guide to Disconnecting Electrical Systems Before Removing a Service Body
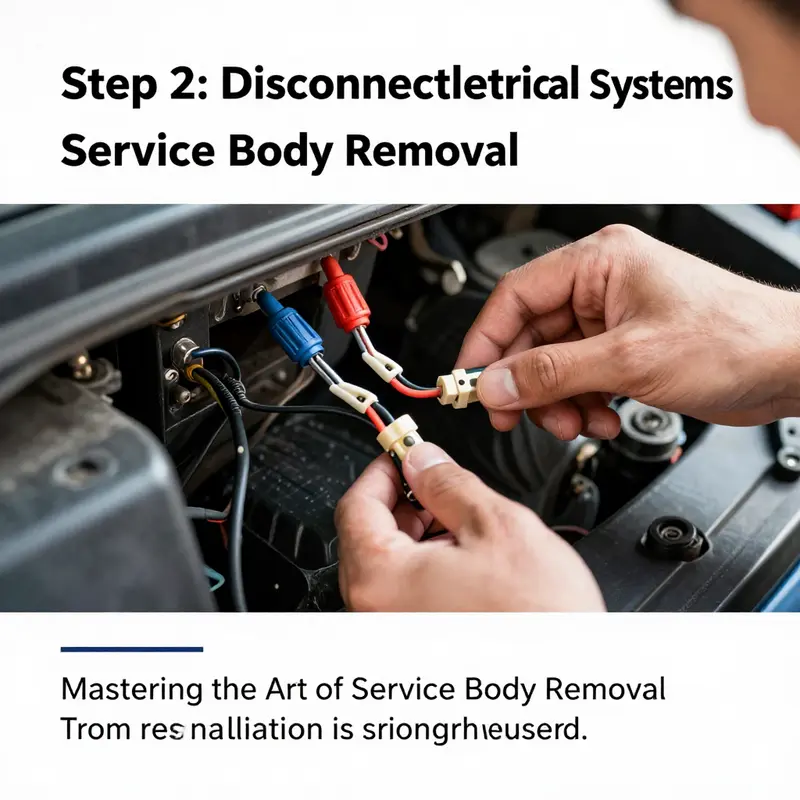
When a service body is mounted to a truck, the electrical system becomes a living, potentially hazardous network that must be treated with respect. Step two in the removal sequence centers on disconnecting power and isolating circuits so that you can work without the risk of short circuits, electric shocks, or accidental operation of the vehicle’s safety and control systems. This chapter weaves together practical cues drawn from established maintenance procedures and the specific realities of service bodies. It emphasizes a calm, methodical approach that protects you, the truck, and the equipment you’re about to handle. The heart of this step is not a rush to tug wires loose but a disciplined sequence that first removes the main power source, then attenuates residual energy, and finally tames the connectors that are most intimately tied to occupant safety and cargo-control functions.
Begin with a deliberate, prepared setting. Park the vehicle on a level surface, engage the parking brake, and, if you will be manipulating electrical components, disconnect the battery. More precisely, you should isolate the 12-volt auxiliary battery, which feeds many auxiliary circuits and aftermarket modules that can be wired into a service body. By isolating the negative terminal first, you immediately cut power to the vast majority of circuits that could backfeed or energize components while you’re working. This single action is the anchor of safety in this phase. It is tempting to jump straight to the fasteners or the wiring harnesses, but the risk of arcing or unintended operation is significantly mitigated when power is removed at the source. The physical act of disconnecting the negative terminal is a clean break, a basis on which all subsequent work rests.
After breaking the main power loop, take a moment to acknowledge the energy that still lingers in capacitors, controllers, and electronic control units (ECUs). Modern vehicles rely on capacitors to maintain memory and to power microseconds of logic during de-energization events. Therefore, a prudent waiting period is wise. In practice, you should wait at least 90 seconds after disconnecting the negative battery lead. That interval allows the system’s capacitors to discharge to a safer level, reducing the chance of a residual charge delivering an unexpected jolt or mistriggering sensors as you begin to separate the service body from the chassis. This pause is small compared to the time you’ll invest in the actual rescue and removal work, but its payoff is substantial: it keeps you free from minor shocks and protects the sensitive electronics you may need to access later.
With power isolated and residual energy sufficiently bled off, attention turns to the specific connectors that tie the service body to the vehicle’s electrical architecture. The safety-critical elements—lighting, sensors, and sometimes a power outlet or refrigeration unit—often come with connectors that are robust and, occasionally, stubborn. Here, the method of disconnect matters as much as the act itself. When dealing with SRS, or airbag-related circuits, you’ll encounter connectors that use a twin-lock design. These connectors are engineered to prevent accidental disconnection and to ensure a reliable seal under vibration. The correct procedure is to unlock in the intended sequence: first release the primary locking feature, then gently separate the connector from its socket. If you ignore the lock order or force a connection without proper release, you risk damaging the connector, the harness, or the module it feeds. Reconnecting follows the same principle in reverse: ensure the connectors are fully seated, and then re-engage the lock until it audibly and visibly seats. A firm, deliberate push is more reliable than a half-press and an assumption that the lock has engaged when you cannot see or hear the click of the secondary lock engaging. The twin-lock approach is a reminder that even seemingly simple disconnections are built on safety redundancies; respect them, and the job becomes predictable rather than precarious.
Labeling and organization are more than housekeeping at this stage—they are part of a larger calculus about future service or reassembly. As you progress, identify each connector, tag it, and, if feasible, photograph the harness routing before you disconnect. This becomes invaluable not only for reinstallation but also for documentation that might be used in future diagnostic work or when another technician returns to the project. In practice, you’ll want to keep track of which harnesses belong to the service body versus those that remain tied to the truck chassis. A simple labeling system—a small bag or a labeled container with the connector name, position, and an optional color tag—can save you hours of head-scratching later. When you remove components, consider storing critical pieces with their associated fasteners in a labeled, weather-protected container. Keeping the order intact reduces the risk of reassembly mistakes and helps maintain the structural integrity and alignment of the service body when it’s time to restore or replace parts.
The handling of the steering wheel pad is a small but telling detail in this process. If you need to remove or temporarily access under-dash electronics or the air-bag module in the steering column area, ensure the pad is placed surface-up. Storing the pad gold-side-up or with the metallic surface exposed can be hazardous if the airbag were to deploy unexpectedly during work. While the probability of accidental deployment is low in a controlled environment, the potential consequences demand a cautious approach. The goal is to minimize any chance of inertial or electrical triggers; a simple placement strategy reduces the risk of injury and protects the integrity of the airbag system should it be required again in the future.
Beyond the physical steps, this phase requires a mindset: treat every connector as a potential energy source and every wire as part of a system that matters to the truck’s function and safety. The safety ethos here is paired with practical habits. Use insulated tools whenever possible and keep each tool out of active contact with exposed conductors. Wear protective gloves rated for electrical work, and keep a clear workspace to avoid accidental contact with the bare metal of the chassis or service body frame. The line between caution and over-caution is thin, but in this context, it’s the line between safe work and an expensive, avoidable mistake.
This chapter also serves as a connective tissue for the broader narrative of service body removal. It’s not a stand-alone sprint but a crucial relay pass that sets up the subsequent tasks of unfastening mounting hardware and lifting the body clear of the frame. The electrical disconnection, done correctly, minimizes the risk of damage to circuits and makes it possible to inspect the chassis for wear, rust, or misalignment without fighting energized components. It also clarifies what you’re dealing with as you approach the next horizon—the moment when the service body begins to separate from the truck and the physical demands of the job become more pronounced. If the wiring had remained live or if connectors had been pried apart without the proper unlock sequence, you would be contending with both electrical hazards and the possibility of fractured connectors that could corrode or fail under load when you finally remount or repurpose the body.
For readers seeking a broader thread on maintenance and safety practices, this discussion aligns with foundational guidance found in established maintenance training resources. You can explore a broader framework of best practices in the related training content here: fire truck maintenance training. This internal link serves as a practical doorway to a wider philosophy of apparatus care that complements the hands-on steps described above. It reinforces that the work you do in Step 2 is not merely about taking a thing apart; it’s about maintaining a culture of careful engineering, where every decision—how you disconnect, where you store a connector, how long you wait for energy to dissipate—contributes to the reliability of the truck and the safety of the people who rely on it.
In closing, the disconnection of electrical systems is a discipline of sequencing and respect for the energy within the vehicle. It requires deliberate steps, appropriate tools, and a mindset oriented toward safety and method. The steps outlined—isolating the 12V auxiliary power, waiting for capacitors to discharge, properly releasing twin-lock connectors, and careful handling of the steering wheel pad—are not merely checks on a list. They are the practical articulation of responsible workmanship. When done correctly, you not only reduce risk during removal but also preserve the integrity of the service body and the chassis for future service or reconfiguration. If at any point the task feels outsized or the harness complexity seems beyond your experience, it is prudent to consult a professional. The objective remains clear: a clean separation that leaves the truck in a safe, inspectable state and paves the way for the subsequent steps with confidence and control.
External resource: General Procedure for Removing the Service Plug (1) can be used as a cross-reference to vehicle safety practices: https://www.toyota.com/tech/service-plug-procedure
Unbolting the Backbone: Navigating Fasteners and Mounting Hardware to Remove a Service Body
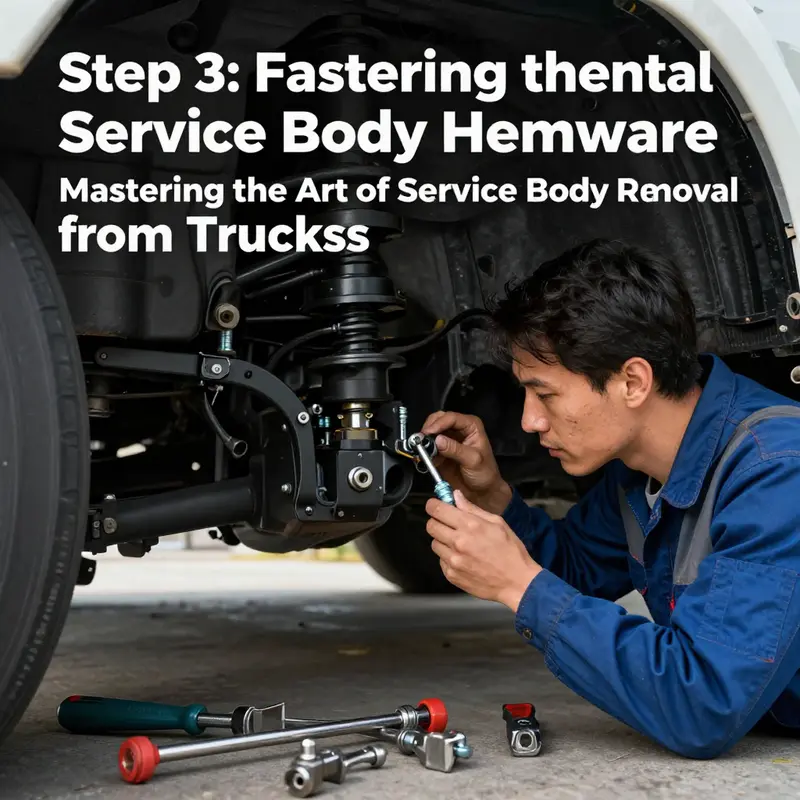
When a service body sits heavy on the chassis, the true test of removal begins at the perimeter where metal meets metal. This is the step where fasteners become the conversation and where careful leverage can mean a smooth separation rather than a struggle that risks frame damage or misalignment. In this phase, the goal isn’t to force the body off with brute force but to identify, access, and correctly disengage every mounting point. A methodical approach keeps the chassis pristine and sets up the enclosure for whichever path comes next, whether a return to stock or installation of a new configuration. The work rests on two things: the right fastener tools and a disciplined sequence that respects the structure of both body and frame. A four-piece body fastener removal tool set, with four tips of different sizes and a long, straight eight-inch handle, is the backbone of this process. These tools are designed to slip around bolt heads, brackets, and clips in tight recesses without marring surrounding paint or metal. They give you the clean, controlled contact you need in the narrow corridors of a service body mounting area. With the proper tool in hand, the task becomes less about force and more about precision, angle, and patience. For technicians approaching this step, such a set is a practical, repeatable investment that pays off in reduced risk and faster progress. As you plan the removal, keep in mind that the geometry of each installation is unique. Service bodies come in a variety of configurations—aluminum boxes, steel panels, or fiberglass compartments—each anchored to the frame by a combination of bolts, nuts, brackets, and sometimes rivets. The fasteners may be straightforward, but they are rarely uniform across the length of the truck. You will encounter bolt heads that lie flush against ribbed members, nuts tucked behind crossmembers, and brackets that sit beneath seals or gaskets. This is where the talking points of preparation become tangible: you must visualize the path of least resistance, anticipate access points, and protect the frame from accidental contact. The removal tools are not magic wands; they are the enablers of careful disassembly in spaces that demand respect for the underlying structure. A key advantage of the four-tip set is the ability to switch tips to match the fastener profile you encounter. When a fastener sits behind a seal, behind a bracket, or inside a narrow recess, the correct tip shape and size ensures you can engage the fastener without rounding the corners or snapping the head. The long handle adds reach, letting you apply steady pressure from a comfortable stance rather than contorting your body into an awkward angle. The idea is to maintain a clean working environment around the mounting points. Before you touch a bolt, nuts, or clip, verify that you have identified every point holding the service body to the frame. In many installations, there are sequential fasteners along the length of the body, plus a few strategically placed near structural crossmembers. You may also find fasteners with thread locker residue, which requires a careful approach to avoid stripping. In such cases a light spritz of penetrating oil, applied sparingly and allowed to soak, can soften corrosion and free stubborn hardware without harming adjacent paint or seals. While applying any penetrating solution, you should keep the area free of flammable materials and ensure ventilation if you’re working indoors. When you begin the actual removal, start at the outer edges and work toward the center. Loosen each fastener just enough to release the clamp without forcing the body to move. As you loosen, label or record each fastener’s location and its corresponding bracket, so reassembly—if that happens—can be precise. A magnetic tray is a simple, invaluable tool here; it keeps nuts, bolts, and washers organized and prevents them from rolling under the truck or into crevices you’ll later struggle to reach. Rubber gaskets and seals, too, deserve careful handling. They may be reusable in some configurations, but more often they need to be removed and replaced if you’re returning to a stock setup or installing a new body. If you find a seal that sticks or binds the body to the frame during disassembly, work it free with a thin, flat tool rather than a putty knife; prying too aggressively can nick bearings, warp gaskets, or scratch the frame rails. The general rule is to respect the geometry and the materials. Steel frame rails, aluminum service bodies, and fiberglass components all respond differently to torque, heat, and pressure. You’ll want to adopt a light touch when possible, applying gradual, even torque and pausing to recheck alignment after each step. In a situation where multiple fasteners share a mounting bracket, remove the outer fasteners first and then work toward the inner ones. This staged approach prevents the body from tilting unexpectedly and helps you maintain even load distribution as you detach the last bracket. As you proceed, constantly monitor the body’s weight distribution. Even with jack stands and supports in place, the service body remains a heavy load that can shift or catch on a corner, creating a danger pinch or a scrape to the truck’s paint. If you encounter a fastener that refuses to budge, stop and reassess rather than applying extra force. A misaligned tool can slip and cause damage. In those moments your line of sight, stance, and tool selection matter as much as the effort you apply. The sequence you follow should feel almost methodical: assess, locate, access, loosen, and temporarily set aside. This is the cadence of a clean removal, one that minimizes surprises during the later steps when the body is free to separate from the chassis. The importance of documenting and storing components cannot be overstated. Keep removed bolts, brackets, and hardware in a labeled container or tray. If you plan to store the body for later use, protect it from environmental exposure by covering it with a clean, dry sheet and placing it on a secure, level surface. A neat, organized workspace reduces the chance of misplacing vital fasteners and keeps reassembly straightforward should the project take a turn toward restoration or replacement. For anyone who wants a broader procedural context on maintenance workflows while performing work on vehicles of this scale, a helpful resource can be found in a related training article fire-truck-maintenance-service-training. That reference reinforces the mindset you need here: approach repair or modification with a disciplined, methodical routine rather than improvisation. Throughout this phase, always cross-check with the manufacturer’s guidelines or service instructions for your specific make and model. The exact fastener types, their torque ranges, and whether any fasteners use thread locker or anti-seize compounds can vary widely. Reassembly, if it occurs, will demand the same attention to detail you bring to disassembly: inspect for corrosion, replace any damaged hardware, and re-torque fasteners to the recommended specifications after the body is reinstalled. If you are not fully confident in this process, or if specialized systems such as built-in refrigeration, hydraulic lifts, or electrical integration are involved, the safe route is to consult a qualified technician. The integrity of the chassis deserves no compromise, and a professional assessment can prevent costly mistakes or safety hazards down the line. Finally, as you clear the final fasteners and begin to separate the body from the frame, pause to perform a final inspection of the mounting surfaces. Look for signs of rust, misalignment, or lingering debris that could affect future compatibility with a new body or a stock return. Clean the frame surface thoroughly, ensuring all old sealant residue, dirt, and corrosion is removed. This step helps ensure that any subsequent installation—new or original—has a solid, uniform base. With the body supported and the fasteners out of the way, the separation can proceed in a controlled fashion, allowing safe lowering to the ground and a clear path to the next stage of your project. External references can provide additional technical nuance for those pursuing deeper, model-specific guidance: https://dormanproducts.com/p-49054-body-fastener-removal-tool-4-piece-set.aspx
null
null
After the Lift: Thorough Inspection and Cleaning Following a Service Body Removal

After the lift settles and the last bolt is removed, the truck’s landscape changes. The service body used to shield the chassis and enclose tools, but its removal leaves raw frame surfaces, exposed mounting hardware, and a labyrinth of wiring and plumbing that must be gently coaxed back into a customer ready state. This is the phase where safety, reliability, and future flexibility hinge on careful inspection and disciplined cleaning. The goal is not merely to remove dirt; it is to verify integrity, prevent hidden hazards from resurfacing later, and set the stage for any reconfiguration, resale, or reinstallation of a new body. A thorough visual and tactile inspection begins at the frame rails and at every mounting point. Look for signs of stress, misalignment, or damage around the holes where the body attached. Even if the fasteners came out cleanly, the surrounding brackets can bow or crack from the torque of years under load. Small cracks in brackets or rust pitting around bolt bosses may indicate a deeper corrosion problem that would complicate reattachment or suggest a need for reinforcement. The absence of obvious problems at first glance does not guarantee long term reliability; a closer, almost forensic, examination is often required. At this stage, the technician will also inspect the harnesses and the connectors that ran from the service body to the truck’s chassis, noting any frayed insulation, cut wires, or areas where moisture might have wicked along the loom. A careful inventory of all hardware—bolts, nuts, brackets, washers—helps reassembly later and protects against the frustration of missing pieces. The story the metal tells under light is telling indeed: rust halos around fastener ports, corrosion along the edges of brackets, and the dull halo of heat treated steel that once fought structural fatigue. If any component looks suspect, it should be set aside for testing or replacement rather than forced back into service. The interior and the spaces formerly occupied by the service body require a different kind of scrutiny. If the enclosure was metal, there may be dents, gouges, or unseen bends along the rails that could throw off alignment with new mounting hardware. If the enclosure was composite or aluminum, you may find galling at the attachment points or a misfit between brackets and frame rails after years of thermal expansion and contraction. Electrical systems—wiring harnesses, sensors, lighting circuits, and power outlets—often fester with corrosion or insulation wear after being tucked into tight spaces or routed through damp environments. Even when the service body itself has been unbolted, a ghost of moisture can linger in channels and conduits. The discipline here is to treat every potential conduit as a candidate for moisture damage, wind up, and insulation breakdown, then to map a plan for cleaning and protection before any reinstallation. This is where the concept of decontamination enters the conversation in earnest, though in a truck removal context the contaminants are typically non biological, such as older lubricants, hydraulic fluids, road grime, and residues from vehicle maintenance tasks. Nevertheless, the same precautionary logic applies: contaminants can migrate into porous materials, into the foam underpadding of seats, into fiber insulation behind panels, and into the porous voids of floor mats or matting. Professional guidelines remind us that contents can permeate porous materials, so you go beyond surface cleaning and address embedded residues. Initial decontamination uses specialized cleaners designed for the types of surfaces encountered—metal, rubber, plastics, and fabric or foam insulation where present. The goal is to suspend and lift residues without compromising the integrity of coatings or seals. In practice, this means applying cleaners with appropriate dwell times, using soft brushes or nonabrasive scouring pads, and testing hidden corners with a rag that reveals any remaining film. Once the bulk of the surface soil and residue has been removed, deep sanitation follows. This stage relies on disinfectants or sanitizers that are effective against the kinds of contaminants encountered in service environments. The selection of products must align with regulatory standards for the kind of remediation being undertaken, especially if there is any chance that residues include biological hazards or chemical residues from previous equipment. The mechanical cleaning is complemented by a chemical strategy: primers and sealants can be applied to metal surfaces to deter future corrosion, while protective coatings can help isolate vulnerable edges and fastener points from moisture. The careful sequence—decontaminate, sanitize, and protect—reduces the risk of rust progression, odor retention, and material degradation that often haunts a neglected chassis after a body is removed. Odor management is the next practical concern. Even if the service body carried nothing more hazardous than spent lubricant or ordinary grime, the residual odors can linger in seams, in the interior liner, or in the void spaces behind panels. Techniques such as ozone treatment or thermal fogging are sometimes used to neutralize stubborn smells; however, these methods require strict adherence to safety practices, proper ventilation, and, for most organizational operations, professional oversight. It is essential to coordinate with the shop’s environmental health guidelines and to ensure that occupants of the vehicle are not exposed to high concentrations of oxidizers or byproducts during treatment. A gentle approach—featuring activated carbon filters, time-staggered airing, and thorough drying of all spaces—often proves sufficient for nonhazardous residues, while more aggressive odor control may demand specialized equipment and professional scheduling. Structural damage assessment naturally follows odor control and cleaning. Removal tasks can reveal problems that were not visible with the body installed. The frame might show micro cracks at bracket welds, corroded fastener holes, or moisture driven corrosion under coatings that have bubbled with age. Floors and crossmembers deserve attention if the service body lived high above the frame for long periods; punctures or thinning of protective coatings can signal the need for patching, re coating, or even more substantive repairs to restore lateral rigidity and longitudinal strength. If the inspection uncovers compromised areas, the recommended response is not cosmetic patchwork but a realistic assessment of the repair scope. In severe cases, practitioners may advise replacing damaged sections, re welding critical joints, or applying corrosion inhibiting primers followed by corrosion resistant topcoats before any reattachment occurs. The goal is to reestablish the frame’s integrity and to ensure that any reinstalled body would not induce new stress concentrations or misalignment. Disposal of waste and materials generated during the inspection and cleaning is a responsibility with legal and ethical dimensions. Old gaskets, rust flakes, contaminated rags, spent cleaners, and used absorbents create a waste stream that may be classified as hazardous. Local regulations for disposal of biological or chemical hazards may apply, and it is crucial to segregate waste streams, label containers, and arrange for approved disposal channels. Even when the materials appear innocuous, it is prudent to follow a cautious approach: bag, label, and seal, then place waste in a dedicated container awaiting the appropriate pickup. The practice protects maintenance personnel, end users, and the environment, and it keeps the project compliant with local health and safety laws. The discipline of organized waste handling also reduces the risk of cross contamination, especially if work proceeds into adjacent compartments or if the vehicle is slated for sale or reconfiguration. Throughout this process, the overarching objective remains continuity—getting the truck ready for reconfiguration or re use without inviting unseen hazards or future repair headaches. Documentation supports this objective. A meticulous record of what was removed, what was found, and what was replaced creates a trail that helps future shop staff or the next owner understand the vehicle’s history. Salvaged or replaced hardware should be cataloged, with measurements, part numbers if applicable, and notes about where each piece belongs. Even if the immediate goal is to install a new body, this documentation helps ensure that the reattachment points align, the wiring harness routes are clear, and the system remains within tolerance for weight and load distribution. In this context, the importance of access to professional guidance cannot be overstated. If the job strays into structural repair, electrical rework, or specialized systems inside the service area, it is prudent to consult the manufacturer’s guidelines or a qualified technician who is familiar with the chassis and the proposed body configuration. The difference between a smooth reinstallation and a return visit to the shop often comes down to the quality of the inspection and the thoroughness of the cleaning that precedes reattachment. Finally, there is a practical but essential step that threads through every other activity: consideration of ongoing maintenance and future readiness. Post removal, a network of checks should be established for routine upkeep, including the inspection of mounting hardware torque values, seals integrated into the frame, and the condition of the electrical harnesses along the chassis. Keeping these elements in good order supports the vehicle’s reconfiguration timeline and protects against corrosion or moisture intrusion during storage or transport. For crews that emphasize long term reliability and readiness, linking this phase to a broader maintenance program is wise. See the resource on fire truck maintenance training for guidance on building a disciplined, inspection driven upkeep routine that translates across chassis and body configurations. fire-truck-maintenance-training-importance If this is your first time planning post removal steps, consider coordinating with a professional shop that specializes in heavy vehicle restoration to ensure that all standards are met and that reattachment is aligned with the latest chassis specifications. In the end, the post removal phase of any service body project is where the quiet, patient work behind the scenes ensures safety, longevity, and value. The inspection and cleaning process is not a one off chore but a sequence that, when performed thoroughly, supports precise reattachment, effective reconfiguration, and dependable vehicle performance for whatever load comes next. For practitioners seeking authoritative behavioral standards in environmental decontamination, the Centers for Disease Control and Prevention offers comprehensive biosafety guidelines that apply across many contexts, including hazardous material cleanup. See the CDC biosafety guidelines for more detail: https://www.cdc.gov/biosafety/.
Final thoughts
Understanding how to remove a service body from a truck is a valuable skill for drivers and fleet managers. Proper execution of this task not only facilitates maintenance and upgrades but also ensures that your truck remains in peak condition. By following the steps outlined in this guide, you will be well-equipped to handle the removal process with ease and confidence. Always remember to prioritize safety and consider consulting professionals if you’re unsure. Mastering this skill can lead to more efficient operations and potential savings in long-term truck management.