
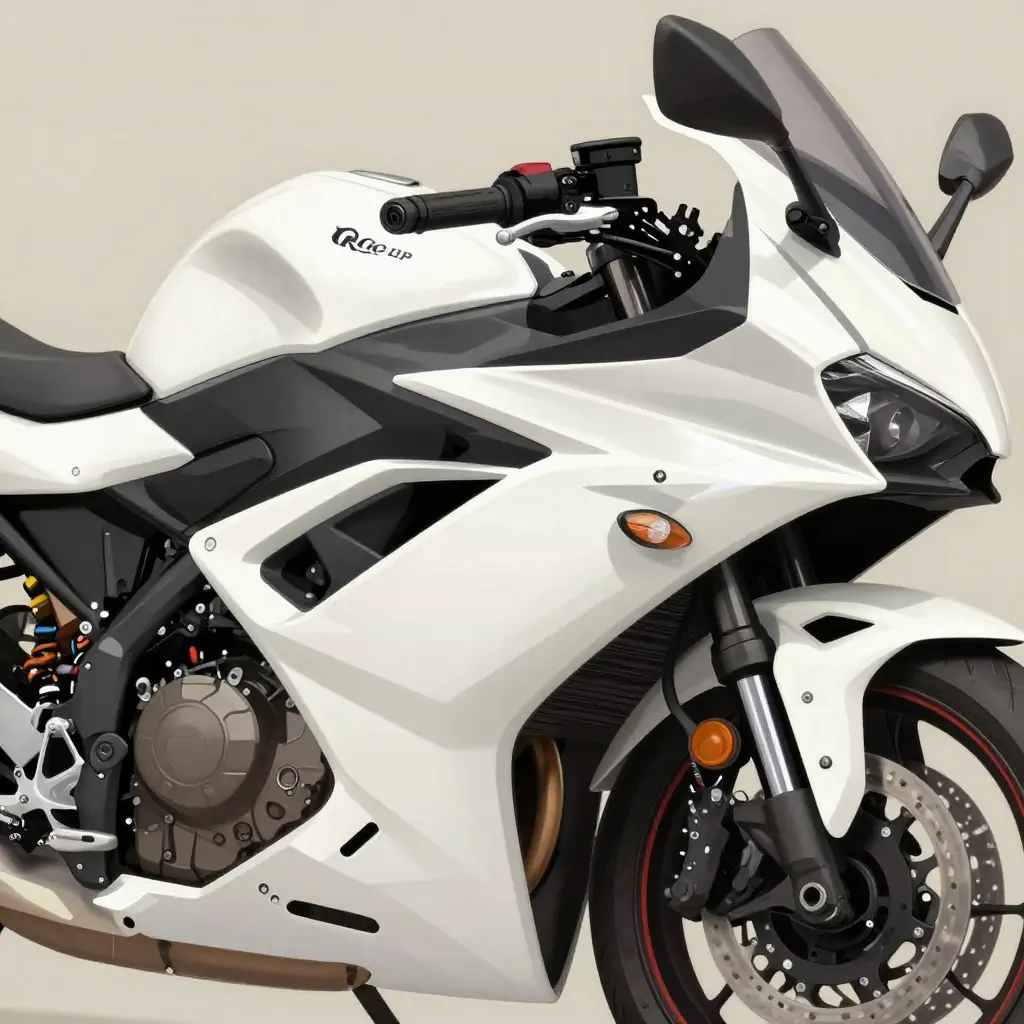
Fairing Kit Replacement: Fitment Gaps, Mounting Tabs and Paint Match
Three things go wrong with aftermarket fairing kits more often than anything else: the panels don’t line up, the mounting tabs break, and the paint doesn’t match. Knowing what each problem looks like before you buy saves a return, a repaint, or a weekend of shimming. It matters whether you’re rebuilding a crashed sportbike or just replacing faded plastic on a daily rider.
A fairing kit replacement means swapping the bike’s original plastic bodywork for a new set of panels. Bolting them on sounds simple. It rarely is, for the same three reasons.
Fitment gaps are the uneven spaces where aftermarket panels meet the frame, tank, or each other; a few millimeters is enough to show as a visible seam and add wind noise. Mounting tabs are the small brackets that hold each panel in place, and weak or misplaced ones let panels rattle, crack, or come off. Paint match is how closely the new panels reproduce the factory finish — color, metallic flake, and gloss level.
Whatever kit you buy has to meet two standards: it must line up with the factory mounting points, and its paint has to match the factory color code. Panels that miss either one don’t look or hold up like the originals.
The rest of this guide covers each problem in turn: why it happens, how to spot it before you install anything, and what you can do about it. Buying from a supplier with a track record for quality service and reliability removes some of that risk before the first bolt goes in.
Why Fitment Gaps Occur in Fairing Kit Replacement
Replacing bodywork is one of the first things riders do after a crash and one of the last things they do to a tired bike. The new panels can look perfect in the listing photos and still leave fitment gaps once they’re mounted — visible spaces where a panel won’t sit flush with the tank, the frame, or the panel next to it. It helps to know where those gaps come from before you order, because most of them start at the factory that made the panels, not at the bike.
Most of the time the cause is manufacturing, not installation. Few aftermarket producers have access to the original tooling. They buy an OEM panel, copy it, and cast the copy in their own molds. Each of those steps adds a little error, and the errors accumulate.
Common Causes of Fitment Gaps
- Mold tolerance variation: Aftermarket ABS molds are machined to looser tolerances than factory tooling, so a panel can come out slightly larger, smaller, or warped compared to the original.
- Inconsistent panel thickness: To cut cost and weight, aftermarket panels are often thinner than OEM fairings. Thin ABS flexes more, so mounting points shift under pressure and leave gaps.
- Deformation during shipping and storage: ABS softens with heat and takes a set when stacked or crushed. Panels packed tightly in a warm warehouse can arrive subtly bowed.
- Structural differences between OEM and aftermarket panels: OEM fairings are engineered as a complete system, with reinforced tabs, ribs, and precise clip locations. Many aftermarket panels simplify that structure, so alignment depends on the installer instead of the design.
These causes stack. A thin panel from a loose mold with one bent tab will gap no matter how hard you tighten it.
Gaps cause more than cosmetic trouble. Open seams let panels flex against each other, and the flexing eventually cracks mounting tabs or rubs through paint at the contact points. They also leak air past the ducts the fairing was shaped to control, which is why a badly fitted kit can add wind noise at speed. And panel lines that don’t line up make a freshly painted bike look like it was assembled from parts that don’t belong together.
Across repair shops and owners, a few failure patterns account for most fairing kit fitment complaints, and mold variation leads by a wide margin.
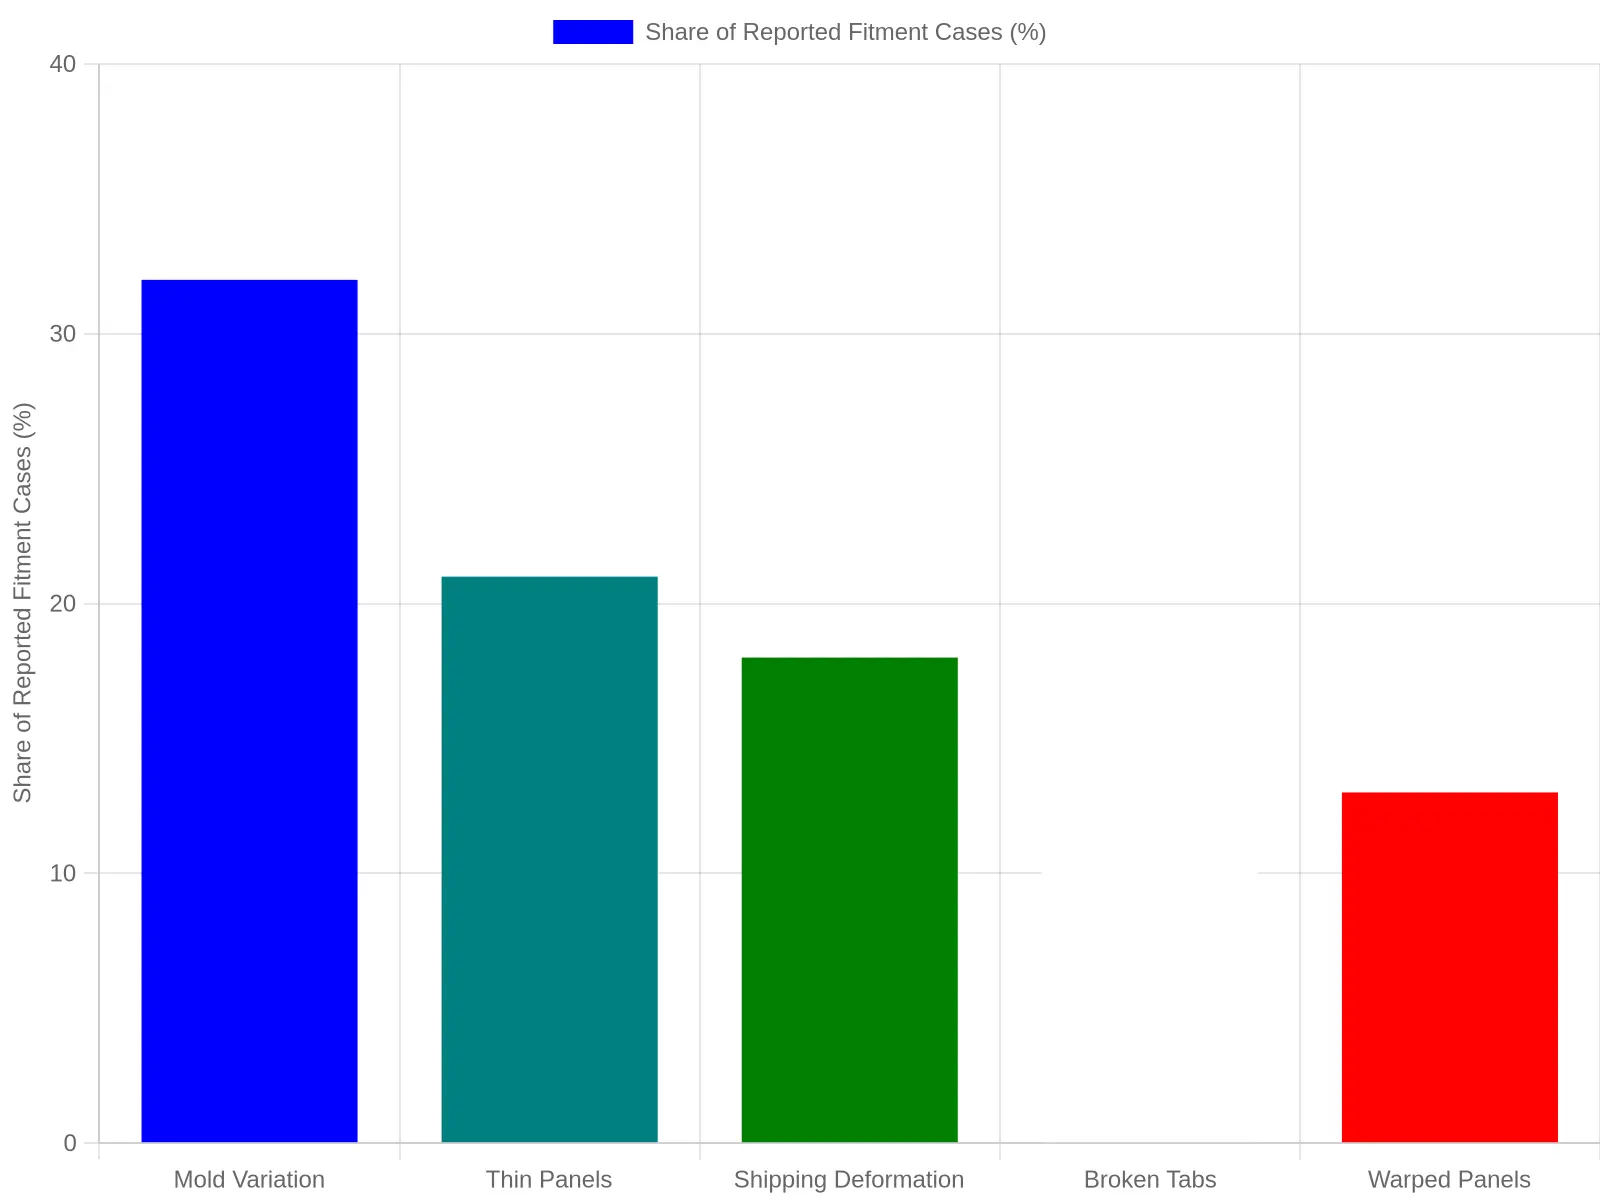
Figure: Share of reported fairing kit fitment cases by primary cause (%).
- Mold variation dominates. Aftermarket fairings come out of different molds than the OEM panels, and inconsistent tooling produces the largest share of gaps and misaligned seams. Dry-fit before final assembly.
- Thin panels, shipping damage, and broken tabs add up. Those causes plus warped panels account for roughly two-thirds of reported cases, so careful packaging, thicker ABS, and reinforced mounting tabs prevent a lot of fitment work.
Plan on doing some fitting regardless. Shims, trimming, and tab reinforcement are normal with aftermarket kits; the question is how much.
| Fairing Source | Typical Fitment Gap Size | Panel Alignment Consistency | Recommended Use |
|---|---|---|---|
| OEM | 1-2 mm (factory tolerance) | High; uniform mounting tabs and pre-drilled holes | Show-quality restorations and warranty-sensitive builds |
| Budget Aftermarket | 3-8 mm | Low to moderate; tabs may require trimming or shimming | Track bikes, budget repairs, and non-critical cosmetic rides |
| Premium Aftermarket | 1-3 mm | High; tighter tolerances with reinforced, pre-drilled tabs | Daily riders wanting a factory-like fit and finish |
| Refurbished OEM | 1-3 mm (varies with repair quality) | Moderate to high; depends on tab repair and paint work | Restorations on a budget and classic models with scarce new parts |
Caption: Typical gap sizes by fairing source. Match the source to how you ride the bike; smaller gaps and more consistent alignment mean less time spent shimming, trimming, and correcting paint.
Mounting Tabs: The Hidden Weak Point in Fairing Kits
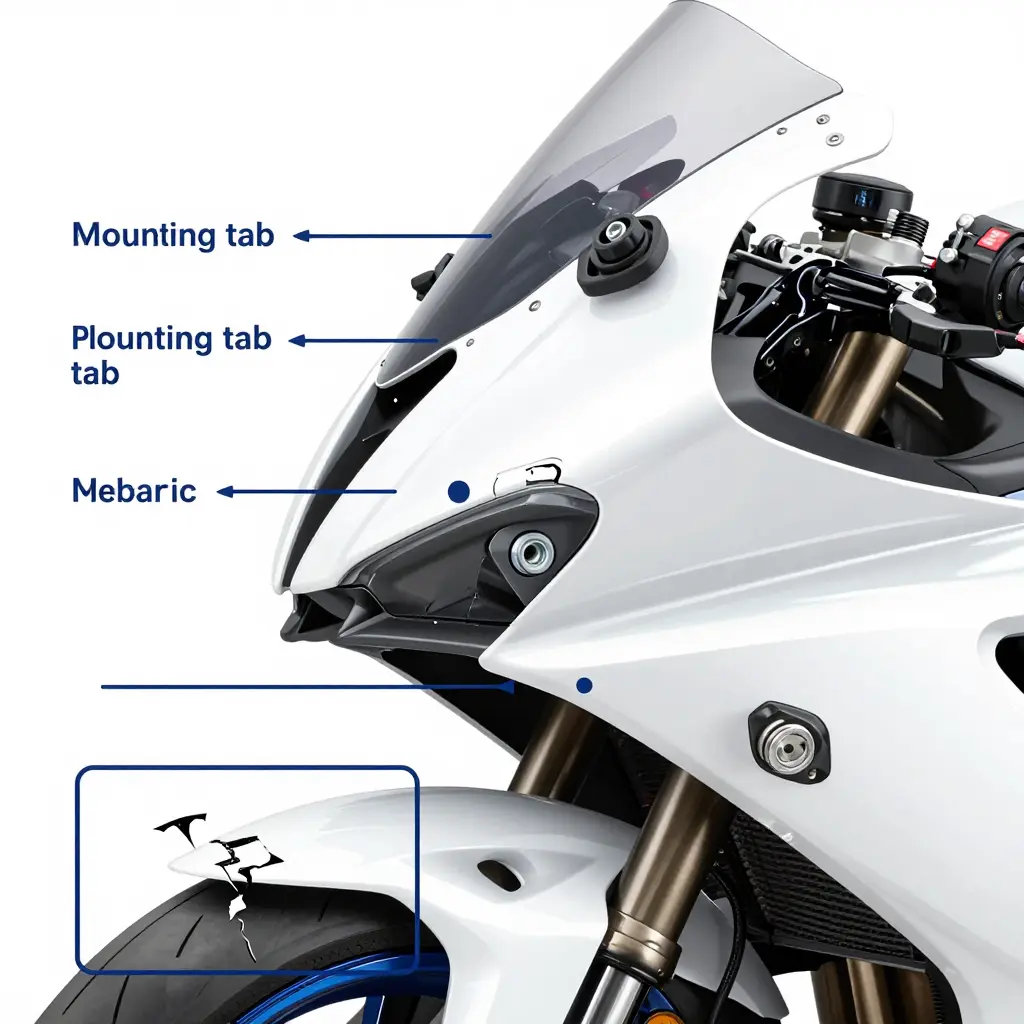
Every fairing panel is held on by mounting tabs — the small plastic or metal protrusions molded into its back. Each tab carries a clip, grommet, or bolt that locks the panel to the frame, the subframe, or the panel next to it. A full sportbike kit can use dozens of them, spread across the side fairings, nose cowl, tail, belly pan, and inner panels. You never see them once the bike is assembled. They still carry the weight and alignment of the whole fairing.
Where They Sit
Tabs run along the inner edges and hidden seams of every panel. A side fairing usually has tabs near the top where it meets the fuel tank, more along the bottom edge, and a few up front where it joins the nose. The nose cowl carries tabs around the headlight housing and mirror mounts. Since none of this shows once the bike is together, most owners don’t look at any of it until something rattles.
Why Broken or Misaligned Tabs Ruin Fitment
A tab does its job only while it is intact and in the right place. Snap one, and the panel loses a fixed reference point; the remaining fasteners take the extra load and the bodywork starts to shift. A hairline crack becomes a loose panel before long. A tab that is bent rather than broken — often after a low-speed drop or on a warped aftermarket panel — pulls the adjoining pieces out of plane and opens gaps at the seams, the headlight, the tank, and the taillight.
OEM Tabs Versus Aftermarket Tabs
Factory tabs are thick, ribbed, and molded from ABS with glass fiber added for stiffness. Aftermarket kits often ship thinner, unreinforced tabs to cut cost and weight. Those flex further under vibration and crack sooner. That is why a proper fairing repair rebuilds or reinforces the tab instead of just fitting a new clip.
Rattling, Vibration, and Misalignment
A broken tab lets a panel buzz against the frame. Engine and road vibration feed the rattle, which works the neighboring bolts loose and fatigues the plastic around them, so one failure tends to produce the next. The visible result is misalignment: uneven gaps, paint rubbed thin at the contact points, and a kit that looks cheap even though the panels themselves are fine.
Quick Reference: How Tabs Fail
| Tab Problem | Immediate Effect | Longer-Term Result |
|---|---|---|
| Snapped tab | Lost mounting point | Panel shift and cracks |
| Cracked tab base | Flex under load | Growth into full break |
| Warped or bent tab | Panel pulled out of plane | Gaps at seams |
| Thinner aftermarket tab | Extra flex | Early cracking and rattle |
If a panel rattles or a gap starts to widen, check the tabs before anything else. They are the fastest thing to rule out and the most common reason a kit never sits quite right.
Not All Mounting Tabs Are Built the Same
Before you blame a gap on the panels themselves, look at the tabs holding them. Thickness, bracing, and the shape of the mounting hole decide whether a tab survives vibration or cracks the first time you torque the bolt. The diagram below compares the three tab profiles you will run into when you order or inspect a fairing kit replacement.
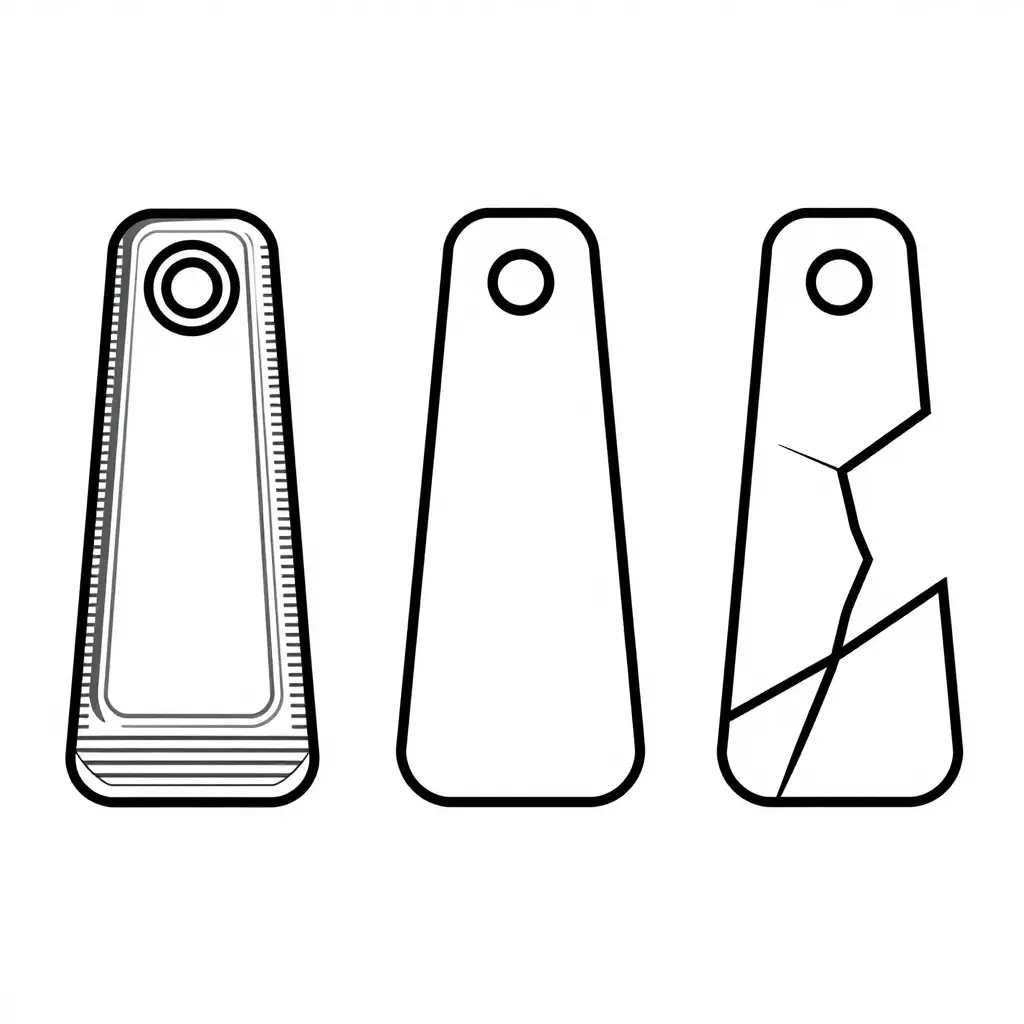
- Reinforced OEM tab: The factory version. Extra material around the hole and reinforcing ribs running back into the panel, enough bracing to spread stress over a wider area so the tab flexes with the bike instead of snapping off.
- Standard aftermarket tab: Flatter, thinner, simpler. It can hold up fine, but there is much less material to absorb vibration, so one over-torqued bolt or a hard bump usually starts the failure.
- Broken tab: The failure you are trying to avoid. Cracks almost always start at the mounting hole and run outward, which is why a loose or over-torqued bolt can ruin an otherwise perfect panel.
Run a finger along each tab when a new kit arrives and compare it against the OEM piece. Reinforced tabs flex with some resistance; thin ones bend and creak. That tells you more about long-term durability than any product photo.
Mounting Tab Inspection Checklist
Go through this list before and after you install any aftermarket kit. It takes a few minutes and it prevents most vibration cracks. Grab a bright light, a pick, and a torque wrench. Weekend wrencher or full-time shop, the same discipline that makes structured fire truck maintenance training work applies here.
- Inspect all mounting tabs for hairline cracks, stress whitening, or sloppy previous epoxy repairs before bolting on any panel.
- Clean and degrease each tab and its mating surface so hidden grit cannot create false tightness.
- Test-fit every panel dry, with no fasteners, to confirm the mounting tabs sit flush against the frame.
- Chase and re-tap any stripped or cross-threaded insert threads before they chew up your new bolts.
- Verify each rubber grommet and damper is soft, correctly seated, and the right size for its tab.
- Compare tab positions against OEM reference points to catch a warped or misaligned aftermarket mold.
- Tighten fasteners by hand first, then torque evenly in a star pattern to avoid cracking the mounting tabs.
- Re-inspect all mounting tabs after the first 50 miles of riding, since heat and vibration expose weak points.
- Photograph every crack, repair, and stripped insert, so the next repair begins from an honest baseline.
Paint Match: What You Are Actually Matching
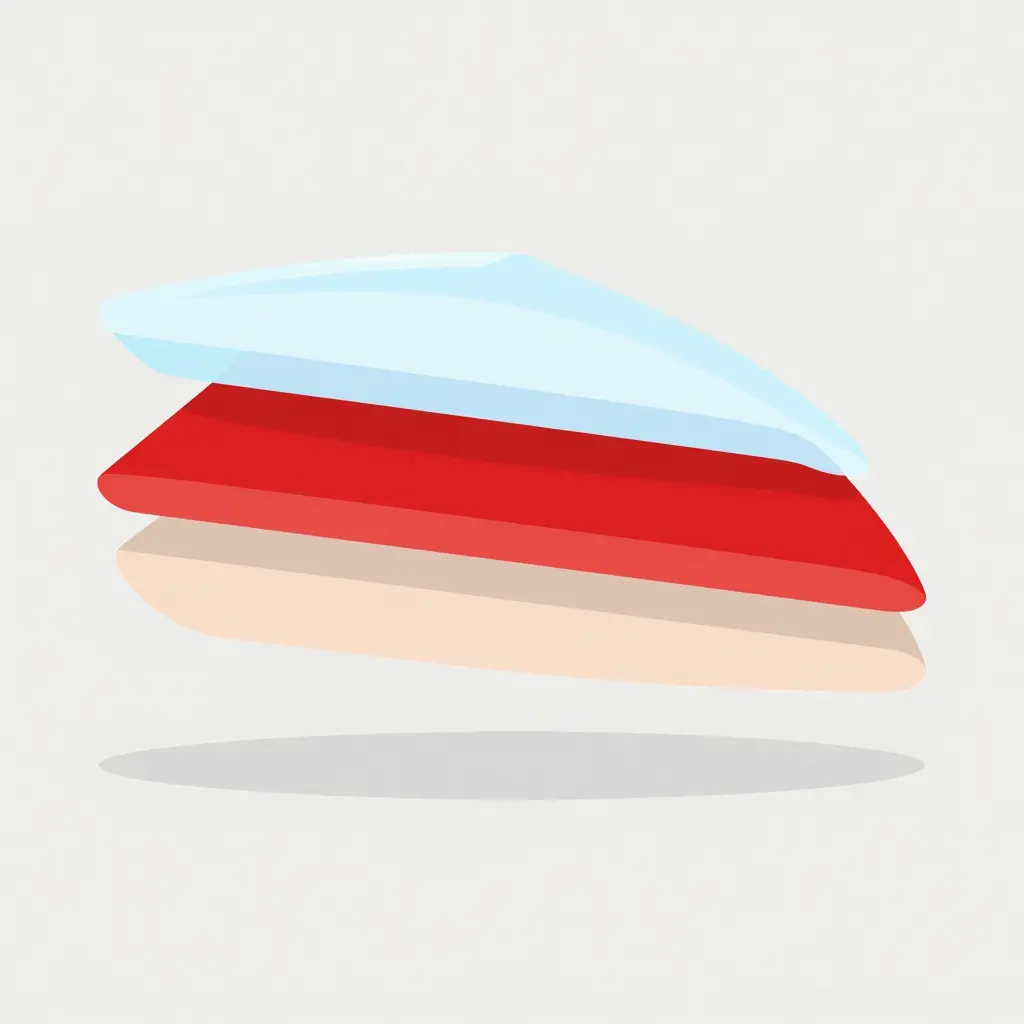
A factory-quality fairing finish is three coats stacked: the base (primer) coat at the bottom, the color coat in the middle, and the clear coat on top.
Why the Layering Matters for a Paint Match
A replacement fairing’s finish is not one coat of paint. It is three, and each one shifts the final color:
- Base coat – the primer foundation that bonds to the plastic and gives the color coat something stable to sit on.
- Color coat – the pigment layer that carries the paint code you’re matching. Its thickness and metallic flake orientation both shift the shade you see.
- Clear coat – the protective top layer that adds gloss, UV resistance, and depth. A thicker or duller clear can make the exact same color coat read slightly differently.
A color that looks right on a spray-out card can still read wrong once it is under clear coat on the bike. Painters who do this for a living judge the match through the clear, never before it. If your replacement panel matches on the color coat and then drifts after the clear cures, the problem is in the top layer, not the pigment.
Common Paint Matching Mistakes to Avoid
A paint job that almost matches ruins a good fairing kit replacement faster than anything else. Even a perfect fit looks wrong when the shade is off.
Trusting screen colors is the first mistake. Monitors, phones, and tablets render color with light, not pigment, so brightness, calibration, and panel type all change what you see. Never approve a paint match from a digital photo or an online swatch library. Ask for a physical sample, ideally a sprayed test card, before you commit.
The second mistake is skipping the clear blend. Basecoat alone rarely blends into the surrounding panels, because most factory finishes use a tinted clear or a pearl layer. Spray and blend the clear coat across the adjacent panels. Without that step you get a visible edge line or a texture change that gives the repair away.
Ignoring batch variation undermines even the best technique. Manufacturers mix color in batches, so the same code can drift between production runs. A factory code is a starting point, not a guarantee. Spray a test panel and check it in natural daylight before the final coat. Age, sun exposure, and UV fade change the original tone too, which is why an older bike often needs a custom tint instead of a stock formula.
Shops that value quality and reliability treat a paint match as a process they repeat, not a one-off guess. Consistency across panels is what separates a professional result from an obvious repair.
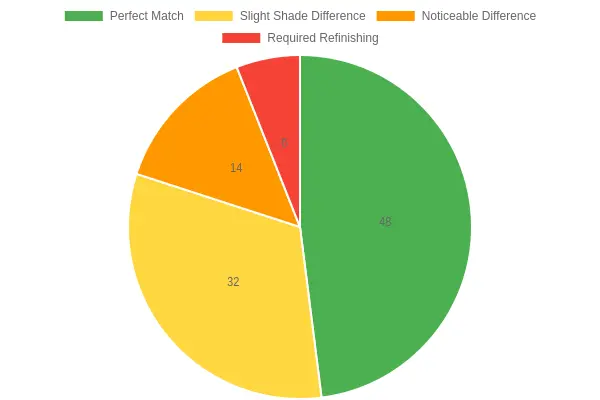
Caption: Paint match outcomes reported by riders and repair shops after fairing kit replacement, ranging from flawless color matches to panels that needed a full respray.
Interpretation: Nearly half of all fairing kit replacements achieved a perfect match straight out of the box, but roughly a quarter still showed at least a noticeable shade difference or required refinishing, which is why it pays to verify OEM color codes and paint batch consistency before installation.
Best Practices for a Successful Fairing Kit Replacement
Bolting on new plastic is the last step, not the whole job. Preparation keeps panels flush and stops you from redoing work. Three steps cover most of it.
-
Test-fit every panel before final assembly. Mount all panels loosely with hand-tightened fasteners. Check alignment along the tank, seat, and frame so fitment gaps stay even on both sides. Remove and reinstall any panel that binds or sits proud before you continue.
-
Align the mounting tabs correctly. Inspect each mounting tab for bends, cracks, or paint buildup. Guide tabs into their slots without forcing them, since excess pressure can crack ABS or fiberglass. Adjust or shim tabs as needed so every fastener threads by hand.
-
Confirm the paint match under natural light. Compare the new panels against the original bodywork in daylight rather than under shop fluorescents. Look at color, metallic flake, and clear-coat sheen. Approve the match before you tighten anything down.
Do the steps in order. Finish all test-fitting before you tighten hardware, and finish alignment before you judge color. Otherwise you scratch fresh paint or trap a bent tab behind a seated panel.
Once everything passes, tighten the fasteners in a cross pattern so you don’t stress the plastic. Write down the torque values and the panel gaps you measured; the next repair then starts from a known baseline. Done carefully, a fairing kit replacement protects both the finish and the bike’s resale value.
Paint Code Matching Reference
| Manufacturer | Color Name | Factory Code Example | Aftermarket Match Notes |
|---|---|---|---|
| Honda | Grand Prix Red | R-157 | Often listed as R157; red tone shifts by model year, so confirm the exact trim |
| Yamaha | Team Yamaha Blue | DPBMC | Deep Purplish Blue Metallic C; aftermarket kits rarely replicate the pearl flake exactly |
| Suzuki | Candy Grand Blue | YBA | Candy and pearl finishes need a tinted clear coat to match factory depth |
| Kawasaki | Lime Green | 617 | Widely called Kawasaki Green; many replicas read slightly deeper than OEM |
| Harley-Davidson | Vivid Black | 9862 | Single-stage solid color; easier to match, but confirm gloss versus denim finish |
| Ducati | Rosso Corsa | 473.101 | High-gloss red; requires a precise base plus clear coat for factory sheen |
| BMW Motorrad | Racing Blue Metallic | 885 | Metallic layering changes the tone, so order by VIN whenever possible |
Caption: Paint codes vary by year, model, and market, so always confirm the exact color code from your VIN or factory tag before ordering a fairing kit replacement. Getting it right the first time saves an expensive repaint, just as dependable quality service and reliability keeps vehicles on the road.
Frequently Asked Questions About Fairing Kit Replacement
How much fitment gap is acceptable?
A small, even gap is normal. As a rule, keep it under 3 to 5 millimeters along panel edges, cowl seams, and where the fairings meet the fuel tank or seat unit. Factory plastics usually sit within 1 to 2 millimeters; good aftermarket sets open up a little more. Consistency matters more than the number: even gaps on both sides look deliberate, while one wide spot usually means a bent bracket, a misaligned subframe, or a warped panel. Install every bolt loose first, then tighten from the center outward so the bodywork settles evenly.
Can broken mounting tabs be repaired?
Often, yes, and you don’t have to buy a whole new panel. Small tabs respond well to plastic welding, or to a patch that bonds a piece of fiberglass or ABS sheet behind the tab with epoxy. Clean the surface, strip all paint and grease, and let the repair cure fully before it takes any load, because tabs carry real stress once the bike is moving. Tabs that have sheared off at the base, or that sit in a high-vibration area, are usually worth replacing instead. A weak tab can crack the panel around it and take your alignment with it.
How do I match paint on older motorcycle fairings?
Old bikes fade, and that is what makes the match hard. Sun exposure has already shifted the original color, so even the correct factory code can look off against a decade-old panel. Find your bike’s color code first, then have a paint shop match it with a spectrophotometer rather than trusting the code alone. Many owners have the whole set sprayed at once so the finish stays uniform. If you replace only one panel, expect to blend into the neighboring piece.
Do aftermarket fairings fit as well as OEM?
Not always, but the gap has narrowed a lot in recent years. Premium sets are molded from modern tooling and often land within a few millimeters of OEM. Budget kits may need trimming, enlarged holes, or a little persuasion. The real difference is usually the mounting tabs and hardware. If fitment matters to you, read reviews, buy from a brand with a track record, and expect to make minor adjustments.
How long does a fairing kit replacement take?
A full set on a sportbike runs most of a weekend — roughly 8 to 14 hours — including removing the old panels, transferring hardware, and fine-tuning alignment. A single panel swap can take an hour or two. Paint work adds days for curing.
How can I reduce shipping damage?
Fairings are large, thin, and easy to crack, so packaging is most of the battle. Buy from sellers who ship in reinforced boxes with foam or bubble wrap between panels, and ask them to cushion the mounting tabs. Inspect the shipment on arrival and photograph any damage before you sign; claims are much easier to win when they’re filed immediately.
Conclusion
Choosing a fairing comes down to three things you can check before you buy: fitment gaps, mounting tabs, and paint match. Get all three right and the bike looks factory-correct and stays that way.
Check the gaps against OEM specifications and make sure the seams are even on both sides. Check tab strength and hole alignment. Check the paint in daylight, not under shop fluorescents. When all three pass, you can buy with confidence.
Where to Source Aftermarket Fairing Kits
Fairing kits come from dealerships, independent body shops, and online exporters, and the range and pricing vary widely. One option is 5 Star Truck Inc, which sells motorcycle fairings for export. The company says it stocks more than 3,000 styles covering nearly every model on the road, prices them 10-40% lower than competing sites, and answers fitment, finish, and shipping questions within six hours. If those numbers hold, that matters most when a build is up on the lift and you’re waiting on parts.
For more on how the company runs its service and quality operation:
- An overview of 5 Star Truck Inc as a premier trucking solution
- The distinctive features that set the company apart
- How 5 Star Truck Inc delivers quality service and reliability
- A closer look at a beacon of excellence in trucking services
If you run a shop, keep a small stock of the kits that move and special-order the rest from an exporter with wide inventory; turnaround stays short on popular models that way. Before you commit, confirm the model year range, check whether tabs and hardware are included, and ask about color codes and clear-coat options so the panels match the existing paint the first time.