
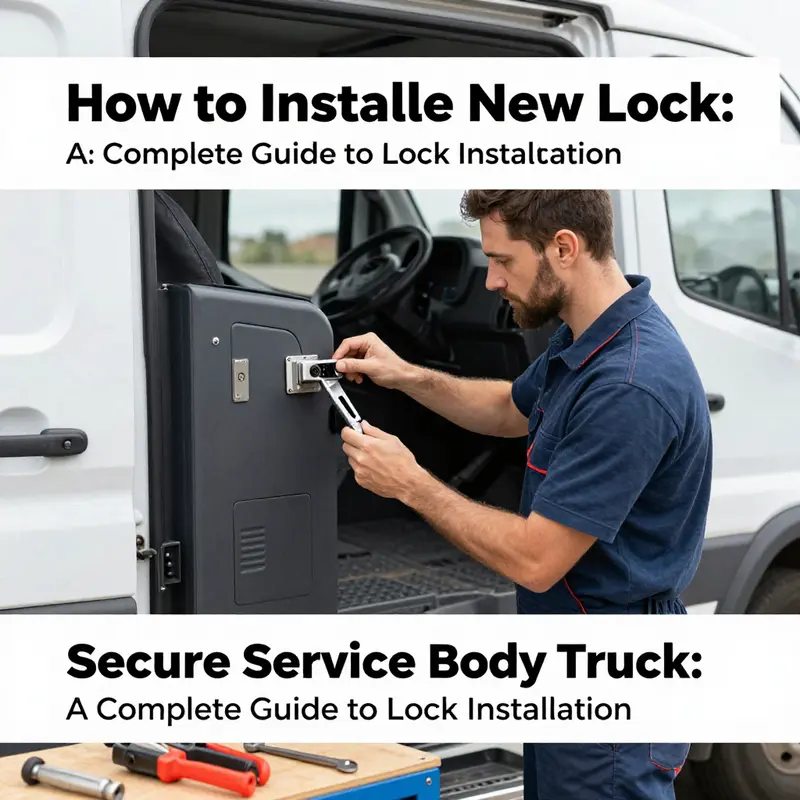
Installing new locks on your service body truck isn’t just about replacing hardware; it’s about enhancing security and ensuring your cargo remains safe. This guide provides a comprehensive look at installing locks, focusing on the specific needs of long-haul truck drivers, trucking company owners, fleet managers, and truck maintenance specialists. Each chapter offer detailed steps from preparation and compatibility checks to the final safety inspections. Understanding each aspect of this process equips you with the knowledge to secure your vehicle effectively and confidently.
Securing the Fleet: Preparation and Compatibility When Installing Locks on a Service Body Truck
Installing new locks on a service body truck sets the foundation for secure, reliable operation across daily routes and demanding sites. The work is not merely about swapping hardware; it is about ensuring a precise fit, preserving the integrity of the metalwork, and providing dependable access control under a variety of weather and road conditions. A thoughtful approach begins with preparation and ends with confidence that the new locks will perform exactly as intended, night after night, mile after mile. The path from empty panel to fully engaged locking system runs through a quiet, methodical sequence that honors both mechanical compatibility and security considerations. By respecting this flow, technicians minimize misalignment, avoid damage to the body, and uphold the vehicle’s weatherproofing and structural integrity. While the exact procedure changes with different makes, models, and lock types, the guiding principles remain constant: clarity of fit, appropriate hardware, and careful verification before the truck leaves the work area.
Preparation is the first anchor. Before touching a single fastener, assemble the tools and materials you will need and create a clean, well-lit workspace. A complete set of screwdrivers, both flathead and Phillips, plus an adjustable wrench or socket set, provides the foundation for most installations. Pliers, a drill with the right bit assortment, a level, and a marker round out the essentials. The new lock kit should include the lock cylinder, the latch mechanism, the strike plate, and all mounting hardware. Lubricant—silicone-based or graphite powder—helps the mechanism operate smoothly over time, especially in dusty or humid environments. Protective gloves and safety glasses are prudent. Park the truck on a flat surface, turn off the ignition, and, for electronic systems, disconnect the battery to prevent unintended activation during work. This simple step alone reduces risk to you and to sensitive electrical components.
Compatibility is the core of success. Lock installation is rarely a one-size-fits-all task. Begin by confirming the exact truck model and year, then identify the specific lock type that the body uses or requires. Service bodies often rely on distinct categories such as liftgate locks for rear doors, side door locks for cab or cargo access, or drop-down locks for lower compartments. The new lock must match this category to ensure proper engagement with the existing latch, hinges, and striker plate. A careful comparison of dimensions is essential: the distance between mounting holes, the depth of the lock housing, and the size and shape of the strike plate must align with the original design. If the new kit requires pre-drilled holes, prepare to mark new ones precisely with a pencil before drilling pilot holes. The mounting pattern is the blueprint for success; misplacing a hole can warp panels, misalign latches, and undermine weather sealing.
Within compatibility lies the cylinder and keyway. If you are replacing only the cylinder, verify that the new key pattern aligns with the old keys or that programming is feasible without compromising security. Some modern systems use coded cylinders that must be matched or reprogrammed to maintain a single-key approach across doors. When in doubt, consult the installation manual or the parts catalog supplied by the original equipment manufacturer (OEM). A pro tip from experienced technicians: always choose a lock kit designed for the specific truck model. Generic or universal options may seem convenient but often fail to align with the precise mounting geometry, strike geometry, or electrical interfaces of commercial service bodies. The risk is not just a leak of security; it can be a misfit that invites abrasion, rattling, or water ingress.
As one crosses from compatibility into actual installation, the physical alignment of every component becomes paramount. The striker plate must align perfectly with the lock’s cam or bolt so that engagement is smooth and repeatable. If electrical or electronic components are involved, the installation extends to wiring routing, connector mates, and, in some cases, integration with control modules. Here too the rules hold: respect the vehicle’s electrical architecture, avoid looms and sharp bends, and secure any cables away from moving parts or regions prone to heat exposure. The moment you step through these checks, you are not just mounting hardware; you are assuring a trustworthy barrier against unauthorized access and safeguarding stored tools and parts from weather, dust, and careless handling.
The preparation and compatibility steps also demand a mindful regard for the vehicle’s finish and structural soundness. Use masking tape or protective shims around the work area to guard against scratches during removal or installation. Handle all components with care to prevent dents or bending that could compromise alignment. Wear gloves to protect your hands from sharp edges and to maintain a clean surface on metal parts that must interact with seals and weatherstripping. The mechanical side of the job is paired with a protective philosophy: ruin neither the lock nor the panel in a bid for speed. If the lock involves electronic features, ensure the battery remains disconnected until a safe final connection can be made. Only then should you test the mechanism to confirm full engagement, smooth key operation, and the absence of binding or play that could highlight a misfit.
In this stage, the narrative of installation tightens into actionable precision. Measure twice, mark once, and drill with steady hands. Align the new lock with its mounting holes, verify the depth tolerance, and secure the unit with the prescribed screws or bolts. Tighten firmly, but avoid over-tightening, which can warp the metal or strip threads. For latch-based systems, confirm that the striker plate lines up so the lock clicks into place with minimal resistance. In the background, consider future maintenance: apply a discreet, light coating of lubricant to the moving parts of the lock mechanism after assembly, and note any adjustment screws that may require periodic re-timing as hinges settle or weather conditions shift.
If any part of the process feels uncertain, or if the lock system integrates with sensitive electronic controls or a nonstandard panel, a certified technician or locksmith with experience in commercial vehicle modifications is worth the short wait. The best practice is to view compatibility and installation as a coordinated effort between the mechanical chassis and the security system. When alignment is precise, weather sealing remains intact, and the mechanism operates without binding, you have achieved a durable, reliable installation that serves the crew and protects the contents of the service body for years to come. This phase mirrors the careful planning that guides broader maintenance strategies and procurement decisions for the fleet. For readers seeking practical, field-tested guidance on ongoing maintenance and training related to fleet reliability, this preparation and compatibility mindset aligns closely with established programs and resources available in professional maintenance training libraries. See more in the dedicated resource on fire truck maintenance service training.
Throughout the process, document every decision: which lock type was chosen, how the mounting pattern was verified, and any adjustments made to achieve perfect alignment. A clear record supports future replacements and helps new technicians reproduce the same high standards. Keeping track of keyways, cylinder compatibility, and the exact hardware used reduces guesswork when returning to the job site and reinforces security across the fleet. While the details may vary from one vehicle to another, the underlying discipline—precise fit, proper hardware, secure mounting, and verified operation—remains the same. For those who want to explore related maintenance principles and how they translate into practical lock installations, see the linked guidance on fire truck maintenance service training.
External resource for further reference: https://www.autozone.com
Removing Old Locks: Laying the Groundwork for a Secure, Upgraded Service Body Truck
Removing old locks from a service body truck is more than a housekeeping chore. It is a deliberate, precision-driven step that reveals the true condition of mounting points, weather seals, and the surrounding metalwork. When you approach removal with care, you not only clear the way for a reliable, modern locking system but also reduce the risk of future misalignment, leaks, or mechanical binding. The process demands patience, a clear plan, and an eye for subtle signs that point to wear, corrosion, or misfit. In many ways, this moment of transition defines the quality of the upgrade that follows. As you begin, you should keep two things in focus: safety and compatibility. Safety means protecting yourself from sharp edges, springs under tension, and, in the case of electronic locking systems, the risk of short circuits or unintended power engagement. Compatibility means ensuring that the new lock will align with the same mounting pattern, striker pocket, and linkage geometry that the old lock occupied. With those guardrails in mind, the work proceeds through a series of careful checks and coordinated actions that begin with identifying the lock type and end with preparing a clean, ready mounting area for the next generation of hardware.
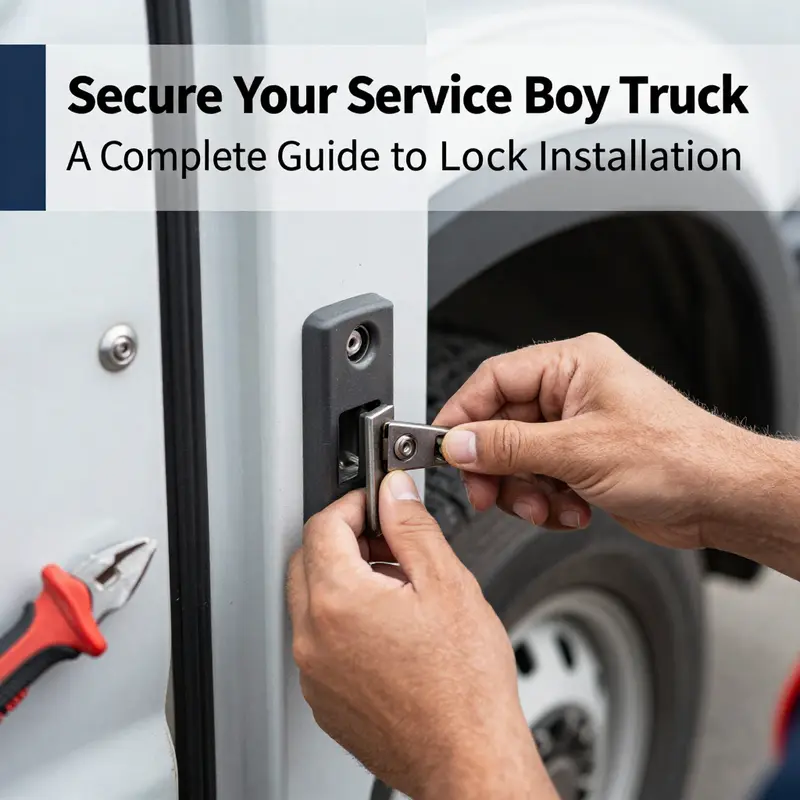
First, identify the lock type and model you’re dealing with. This is not a trivia question but a practical prerequisite. Different locks—whether they are padlock-compatible latches, keyed deadbolts, or electronic locking systems—sit in panels that have evolved over the years. A correct identification prevents you from purchasing incompatible parts and delays later steps. Take a moment to visually inspect how the lock sits in its surround: the location of screws, the presence of cover plates, and any brittle seals that might influence how the new hardware will sit once installed. If the lock is integrated with a power or control system, note the wiring routes and any connectors that could be affected by panel removal. In this regard, having a clean workspace and a small container for fasteners helps keep things organized and prevents misalignment when reassembly occurs.
Next comes access. You’ll need to reach the lock mechanism from the interior side of the panel or door. This often involves removing the interior panel or a trim cover that protects the lock housing. Use appropriate tools to avoid marring the paint or metal. A plastic trim removal tool is ideal because it minimizes the risk of scratching or bending surrounding pieces. As you loosen screws or fasteners, work slowly and deliberately, watching for any concealed components such as springs, rods, or linkage arms that may shift when the panel is lifted. If you encounter a stubborn fastener, pause to assess whether it’s corroded or seized and consider a penetrating lubricant and a gentle tapping with a wooden block to avoid stripping the fastener heads. The goal is to expose the lock housing without forcing its neighboring panels apart or compromising weather seals that keep moisture out of the cargo area.
With the lock housing visible, the next step is disconnecting any electrical connections, if applicable. Electronic or remote-entry locks often rely on a wiring harness that runs from the lock to a control module or vehicle electrical system. Before you unplug anything, ensure power is off to the vehicle. This is a crucial safety precaution to prevent arcs or short circuits while you’re handling connectors, pins, or soldered joints. Carefully disconnect the harness and label the connectors to simplify reconnection during reassembly. A small note card or masking tape on each connector works well, especially if space is tight and multiple cables must be distinguished later. If the lock cylinder is secured by pins or bolts that pass through the panel, note the orientation of these fasteners and remove them in a way that keeps their positions intact for future reference.
Removing the lock cylinder and the lock body itself is often the moment when the old system finally yields. Start by locating any caps, covers, or trim pieces that conceal mounting bolts or pins. These may be hiding behind a decorative cap or beneath a layer of sealant. Remove these concealments carefully to avoid bending metal or tearing seals. Once you access the fasteners, back them out evenly to prevent any one side from pulling on the panel thread or distorting the mounting hole pattern. As the lock starts to loosen, guide it away from the opening to avoid scraping the paint or gouging the panel edge. If the lock is stubborn because of corrosion or a tight fit, apply gentle heat with a heat gun in short bursts or use a penetrating lubricant to free it. Do not pry aggressively, as that can warp the panel or misalign the mounting surface for the next lock.
Extraction of the old lock should be performed with a steady, controlled pull. If the lock is connected to rods or cables, there will be some resistance as you detach these linkages. Work slowly to prevent bending or kinking the rods. Label or photograph the linkage positions before removal so you can replicate the exact routing when you install the new hardware. The moment the old lock comes free, inspect the mounting area thoroughly. Look for signs of wear, grooves worn into the metal by a long-removed bolt, or corrosion around the hole pattern. If you notice any elongation of mounting holes or a mismatch in the bore size, you may need to repair or re-tap the mounting surface before the new lock goes in. Even seemingly minor flaws—such as a nick in the edge of a hole or a shallow burr—can compromise alignment and the smooth engagement of the new latch.
The mounting area deserves particular attention, because it determines how well the new lock will perform. Clean the surface, removing old sealant, rust flakes, and debris. A clean, flat surface ensures that the new lock sits square to the panel and aligns with the striker plate precisely. If the old bore is damaged or oddly sized, assess whether the new lock’s mounting pattern aligns with the existing holes or if you’ll need to drill new pilot holes. When new holes are necessary, measure twice and drill small pilot holes first. Use a drill bit that is appropriate for the metal thickness and brace your work with a level to keep the lock plumb as you bolt it in. The key is to maintain the same plane for the lock and the door so the latch engages cleanly every time. A misalignment of even a fraction of an inch can create binding, partial engagement, or wear that shortens the life of the new lock.
Compatibility checks belong here as well, tying the removal phase to the installation phase that follows. Before you remove the old lock, take a moment to confirm that the new lock you intend to install shares compatible mounting dimensions, such as the hole pattern, the striker position, and the depth of the lock body. If there are discrepancies, you may need to modify the mounting area or choose a lock model that seamlessly fits the existing footprint. This is where a careful cross-check against the manufacturer’s instructions becomes essential. If you encounter a mismatch, consult the service manual or a qualified technician who has experience with commercial vehicle hardware. It is far easier to address compatibility at this stage than to realize an incompatible lock only after you’ve sealed the panel and closed it up for service.
As you complete the removal, recheck the surrounding panels and weather seals for damage or gaps. Any scratch, dent, or misalignment can be a source of moisture intrusion, wind noise, or dirt ingress once the truck is back in service. If you find compromised seals or jagged edges, address them now so the new lock won’t compromise weatherproofing or structural integrity. Finally, document what you removed, what you found, and what you’ll replace. A short checklist that captures lock type, mounting hole pattern, and any alignment notes helps keep the installation phase organized and efficient. It also provides a reference should future maintenance come up or if you need to revert to the old configuration for any reason.
For practitioners who want to connect these steps to broader maintenance practices, a resource on routine maintenance training can be a helpful companion. Fire this into your workflow with a simple internal reference: Fire Truck Maintenance Service Training. This keeps the maintenance philosophy consistent and reinforces careful handling, record-keeping, and a disciplined approach to upgrades that minimize downtime. You can explore this broader context at the linked resource within the industry guidance. Fire Truck Maintenance Service Training.
Once the old hardware is removed and the mounting surface is confirmed ready, you’ll be positioned to move into the installation phase with confidence. The removal process, when done with precision, becomes a reliable diagnostic and preparation routine that reduces surprises later. It reveals the true condition of the truck’s bodywork and ensures that the new locking system you install will perform as intended. It also provides a clear, evidence-based baseline for any upgrades that follow, from adjusting striker alignment to addressing any weatherproofing concerns. In this way, removing old locks is not merely about disposal; it is a deliberate step toward a more secure, dependable locking solution that will protect the service body, its contents, and the people who rely on it every day. For further reading on related maintenance and procurement considerations, you can consult additional implementation resources that emphasize thoughtful upgrades and best practices for service vehicle hardware. As you prepare to install the new locks, remember that the quality of the mounting area and the care you take during removal will determine the longevity and reliability of the entire system. External reference points can guide you through the nuances of component selection and installation strategy, including specifications and mounting tolerances that are essential for a clean, durable fit. For broader external guidance, see this resource: https://www.amazon.com/dp/B0CJW7QK2T?th=1.
Securing the Service Body: A Thorough, Integrated Guide to Replacing Lock Mechanisms on Work Trucks
Replacing lock mechanisms on a service body truck is not merely a matter of swapping parts. It is an exercise in aligning security, weather resistance, and reliable operation across a harsh working environment. The service body door closures endure daily use, exposure to dust, moisture, and jostling on rough roads. A new lock must fit the existing frame, latch geometry, and hinge patterns, while delivering smooth action and robust security. The process begins with careful preparation: verifying compatibility, selecting a high-quality mechanism, and gathering the right tools. The aim is to minimize metal fatigue, prevent misalignment, and ensure the locking routine remains instinctive to the operator. The general approach remains consistent across lock types—whether a padlock-compatible latch, a keyed deadbolt, or an electronic system—but the specifics demand attention to the electrical harnesses, the striker plate, and the enclosure sealing.
Before touching any metal, inspect the door and lock area. Confirm mounting patterns and dimensions, then confirm the lock’s interface with the latch or striker plate. The compatibility check is not cosmetic; it protects the door skin from extra holes or misalignment that could lead to leaks or wind noise. Tools go beyond screwdrivers and wrenches. A drill may be required for new mounting holes, a tape measure ensures precise alignment, and a level helps keep the line of closure true. For electric locks, have a test light and multimeter to verify circuit continuity and to isolate potential shorts before power is applied. High-quality components, chosen from reputable suppliers, deliver long-term performance and reduce the need for early maintenance.
With the new lock on the bench, the removal of the old mechanism begins. Access usually starts behind the interior panel of the door, where you will encounter screws hidden beneath trim and clips that hold the panel in place. Use a plastic pry tool to minimize scuffs, and keep track of each fastener. When removing the old lock, disconnect any wiring harnesses or linkages such as rods or levers. Label these connections to ensure precise reassembly. The risk of forcing parts is real; bending a rod or snapping a clip can create misalignment that is difficult to correct later. Once the panel is off and the lock is freed from its mounting, take time to inspect the surface for burrs, paint cracks, or corrosion near the mounting holes. The door structure should be inspected for signs of prior field repairs or misdrilled holes, which could undermine the new lock’s seating.
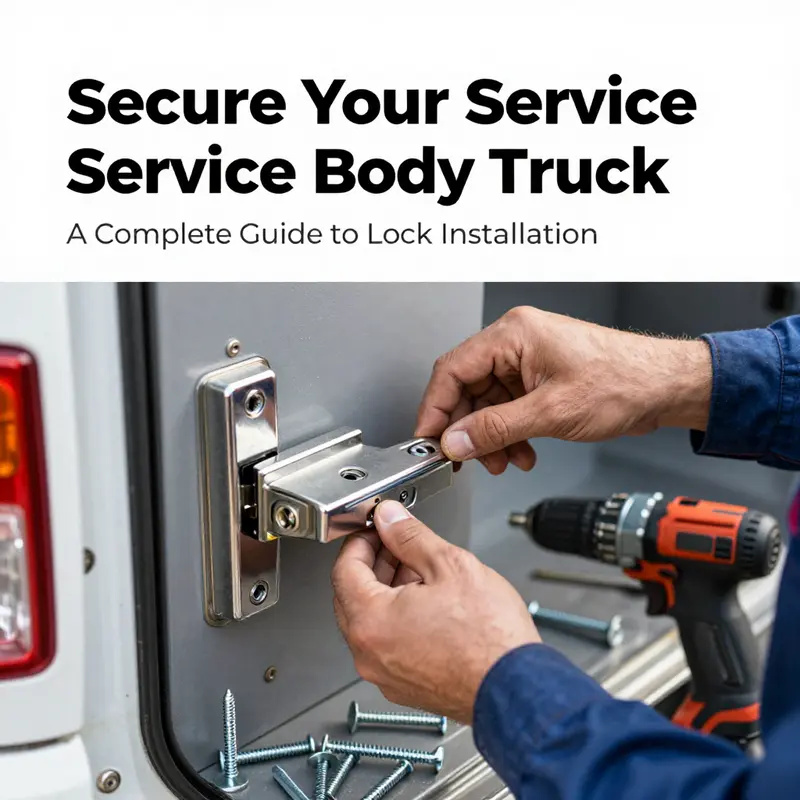
Installing the new lock is the heart of the operation. Begin by positioning the mechanism so it sits square and aligned with the door opening. Use the manufacturer’s template or the existing holes as a guide; if new holes are needed, mark them with care and drill pilot holes. Fasten the lock with the supplied screws or bolts, tightening firmly but not to the point of deforming metal or stripping threads. This is particularly important on lightweight panels or composite layers where overtightening can crush or warp the panel. For latch-based systems, verify that the striker plate aligns with the lock tongue. The striker must engage with minimal resistance and remain securely anchored to the frame. If the installation involves an electronic lock, route and secure the control wiring so it cannot abrade or snag on moving parts. Insulation or weatherproof gaskets might be necessary where wires pass through metal to prevent moisture intrusion.
Reconnecting linkages and confirming operation follows. Reattach mechanical links between the lock and the door handle or latch assembly. These connections should be smooth, with no binding or slack that could cause lag in engagement. A test of movement at this stage is informative: manually operate the handle and operate the lock several times to ensure the lever travel is correct and the latch retracts cleanly every time. If the system is electronic, reconnect the control wires and perform a power-on test. Check battery connections, verify that the lock responds to the command to lock and unlock, and observe whether the interior and exterior indicators align with the actual state of the mechanism. A careful check for heat buildup in operation is prudent during the initial cycles.
With the mechanical and electrical interfaces dialed in, the door panel is reattached. Reinstall the interior trim, then reseat and clip it in place so no edges protrude. Recheck that all fasteners are secure and that no wires or components are exposed. A final functional test should simulate real-world use: operate the door handle, test the key or remote control to ensure full engagement, and verify weather seals remain intact around the edge to prevent wind noise or water intrusion. The sequence should be repeated multiple times to confirm enduring performance. Persistently loose components will betray themselves under vibration, so a final torque check on mounting screws is a wise step. In fleet contexts, the lock not only protects tools and inventory but also supports workflow efficiency; a misaligned lock can slow technicians and invite security concerns. Thus the last checks are as much about daily reliability as about security.
For more complex installations—where electronics, integrated panels, or high-security demands are present—it is prudent to seek professional support. A certified technician or locksmith with experience in commercial vehicle modifications can prevent common mistakes, advise on weatherproofing strategies, and validate the integration with any central control module. The goal is not merely to install a lock but to restore the service body’s integrity—its ability to perform in rain, mud, heat, and constant use without prompting worry.
All told, replacing a lock mechanism on a service body truck is a disciplined, repetitive craft when done right. It begins with a clear plan, continues with careful disassembly, precise alignment, and deliberate reassembly, and ends with a rigorous testing routine that mirrors the conditions of a busy workday. The right approach protects assets, reduces downtime, and preserves the truck’s value. It also reinforces responsible maintenance practices across the fleet, contributing to safety, security, and efficiency on every job site. For ongoing maintenance and training resources, consider the broader fleet maintenance context offered through dedicated training materials that emphasize hands-on practice and procedural consistency. For ongoing maintenance guidance specifically around vehicle systems relevant to this chapter, you may consult the internal resource on fire truck maintenance service training. This reference can help crews maintain discipline in routine checks and ensure technicians approach each repair with the same methodical mindset. Beyond the initial install, establish a routine maintenance plan. Inspect door seals and mounting hardware monthly, test the lock action at every service interval, and replace worn components before they fail. Apply a light, manufacturer-approved lubricant to moving parts, and ensure electrical connections stay dry and insulated in all weather conditions.
External resource: https://www.sae.org/standards/.
Lock Performance and Security Checks: Rigorous Testing for Service Body Trucks
Installing a new lock is only half the job. The other half is proving that the lock will keep the service body secure under real use. A methodical testing routine uncovers fitment issues, electrical faults, and weaknesses that could lead to theft, water ingress, or premature failure. This chapter walks through a practical, step-by-step protocol that covers mechanical and electronic systems, environmental staging, and documentation practices so your new locks deliver dependable protection.
Begin by creating a controlled workspace for testing. Park the truck on level ground and secure the ignition. If you worked on any electrical circuits, reconnect the battery only after verifying wiring routes and fuses. Keep basic tools nearby: a torque wrench, screwdrivers, a flashlight, a multimeter for electrical checks, and an assortment of fasteners for adjustments. Have a friend or assistant help for door-pull tests and on-road checks. Safety matters: wear gloves and eye protection, and avoid testing in heavy traffic or unsafe locations.
Start with simple, repeatable function checks. Operate the lock manually with the key or internal mechanism. Cycle it open and closed at least a dozen times. Listen for smooth operation and note any grinding or catching. Feel for resistance spikes or rough rotation. Mechanical locks should move freely without wobble. Electronic locks should respond promptly and consistently to remote commands and in-cab switches.
For electronic systems, validate power and control logic before any physical stress tests. Use a multimeter to check voltage at the lock actuator under load. Confirm proper grounding and that any inline fuses match the manufacturer’s rating. Test battery-backed features, if present, and check how the system behaves on low vehicle battery voltage. Confirm the remote or smartphone pairing functions reliably and that the signal range covers typical parking and approach distances.
Alignment is the most common source of problems. A lock that is slightly off will bind under load and wear prematurely. Close the door and observe the engagement between the latch and the striker plate. The latch should seat fully and flush with the plate. If the striker is adjustable, tweak its position in small increments and retest. If mounting holes were elongated or new, verify fastener torque. Use the recommended torque settings to avoid warping the mounting flange or crushing the surrounding sheet metal.
Weatherproofing and sealing are next. Service body trucks face rain, salt spray, and road grime. Inspect for gaps around the lock body and striker. Any exposed holes should be sealed with compatible gaskets or sealant. Check that plastic trim and interior panels are reinstalled snugly to prevent water from reaching the lock internals. For electronic locks, confirm connectors are sealed and that wiring passages use grommets where they go through sheet metal. Consider a light application of a corrosion inhibitor on exposed fasteners and moving parts, unless the lock manufacturer advises otherwise.
Security testing must be firm but controlled. Simulate forced-entry attempts to identify weak points. With the door locked, pull hard on the handle from both inside and outside. Apply steady force, then a brief, stronger tug to mimic a prying attempt. The door should remain unmoved and the latch should not deform. If the latch slips or bends, reinforce the striker or change to a heavier-duty mounting. Avoid destructive tests that void warranties; the goal is detection, not destruction.
Vibration and road testing are essential for commercial vehicles. After bench tests, drive the truck over a typical route that includes both smooth and rough roads. Listen carefully for rattles, intermittent binding, or lights triggered by electrical locks. Stop periodically to check fastener tightness and to operate the lock again. Vibration can loosen mounting bolts and shift strike alignment, so re-torque hardware after the first short trip.
Temperature extremes affect both mechanical tolerances and electronics. If possible, test locks when ambient temperatures are low and after they warm up. Freezing can stiffen lubricants and make locks sluggish. Heat can expand metal and alter clearances. For electronic locks, confirm that battery replacements and backup power strategies are documented and that performance remains acceptable across your service area’s expected temperature range.
Pay attention to key management and documentation. Label new keys and record serial numbers or key codes for future ordering. If multiple compartments exist, decide whether to key all locks alike or to keep separate keys. Consider engraving or storing a master key reference securely. Create a brief maintenance log that lists installation date, torque values used, lubricant types, and any adjustments made during testing. This helps future technicians diagnose problems without repeating initial troubleshooting steps.
Fine-tune latch lubrication. Use lubricants recommended by the lock maker or a dry PTFE spray where moisture attraction is a concern. Avoid heavy grease in areas where dust and grit will accumulate. Lubricate pivot points and key cylinders sparingly. After applying a lubricant, cycle the lock multiple times to distribute it and then wipe away excess. Note any changes in feel; lubrication can reveal or mask other issues.
If you installed an integrated electronic system, verify interoperability with vehicle security systems and alarms. Confirm that the lock does not trigger false alarms when the engine starts or when the vehicle experiences normal vibration. Test emergency overrides and manual unlock procedures in case of failure. If the device supports remote diagnostics, activate these features and ensure data access is secure.
When all functional and security tests pass, perform a final inspection and cleaning. Tighten any remaining fasteners to spec and reinstall interior panels. Clean the lock and surrounding area to remove fingerprints, filings, or sealant residue. Photograph the installation and note final settings in your maintenance log. These records are valuable for warranty claims and future service.
Not every installation is straightforward. If you find persistent binding, electrical anomalies, or structural weaknesses, consult a technician or locksmith experienced with commercial vehicle bodies. Professional insight can save time and safeguard your cargo. For fleet operators, integrate lock testing into regular maintenance schedules so that small issues are fixed before they become security failures.
For additional step-by-step guidance on fitting and testing locks in service bodies, you can refer to the detailed how-to guide here: https://www.pacificoauto.com/blog/how-to-install-new-locks-for-a-service-body-truck.
For broader maintenance and readiness topics that support secure vehicle operation, see the material on fire truck maintenance training importance at fire truck maintenance training importance.
Final Inspection and Safety Check: Ensuring Your Service Body Truck Locks Are Secure and Reliable

Final Inspection and Safety Check: A Step-by-Step Walk-Through
After installing new locks on a service body truck, the final inspection and safety check tie all work together. This stage verifies fit, function, and long-term reliability. It also reveals installation errors that could cause theft, weather damage, or operational failures. Treat this as a checklist you perform methodically. Move door to door, compartment to compartment, and test every function as if the vehicle were already in service.
Begin with a careful visual sweep. Stand back and close each door slowly. The panel should sit flush against the frame. Look for uneven gaps, a door that tilts, or any place the seal fails to compress. Small misalignments may indicate a striker plate that needs shifting or a latch that sits too low. Inspect fasteners and brackets closely. All screws, bolts, and rivets must be present and snug. If you welded any mounting points, examine the welds for uniformity and lack of cracks or holes. If something looks weak or inconsistent, pause and have a qualified welder or fabricator confirm the work.
Next, evaluate the exposed hardware and surrounding metal. Check for paint chips, burrs, or sharp edges created during drilling or fitting. Clean any metal filings or debris from the area. These particles can work into the lock or latch and accelerate wear. Wipe the lock body, cylinder, and surrounding flange with a lint-free cloth. Remove grease or adhesive residue that may hide defects. Confirm that any rubber or foam seals are correctly seated and undamaged. A good weather seal prevents moisture entry, which is often the root cause of long-term lock failure.
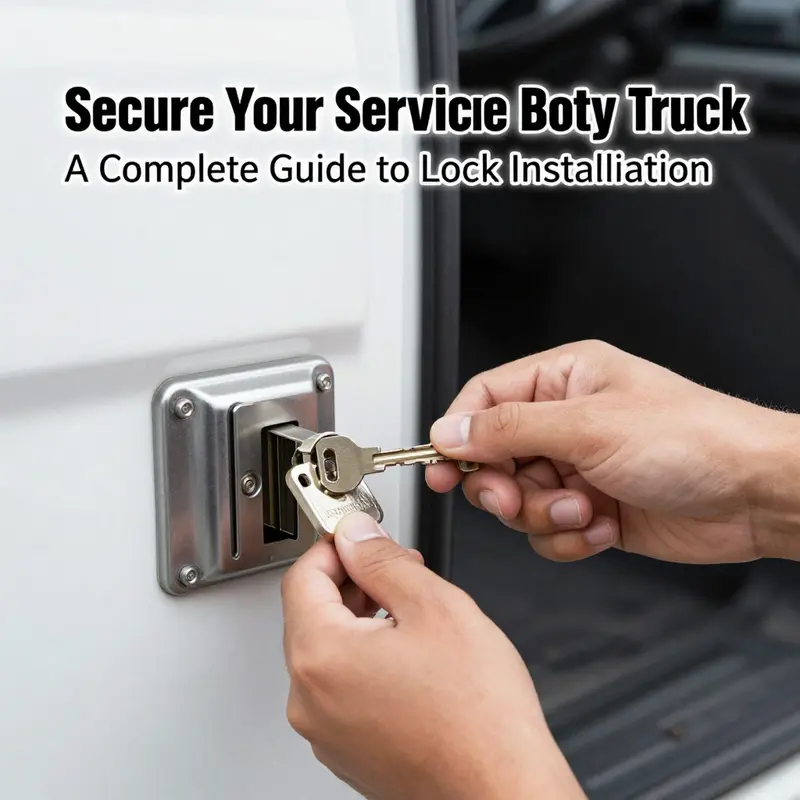
Functional testing should follow immediately after visual confirmation. Operate each door several times using the manual handle first. Open and close the door at normal speed, then at a slightly firmer motion to test dynamic engagement. The latch should catch cleanly without binding. If the door bounces or requires extra force, realign the striker or adjust the mounting bolts slightly. Test the keyed cylinder by inserting the key and turning it through its full range. The key must rotate smoothly, without grinding, slipping, or sudden catches. For locksets that use a cam or deadbolt, ensure the bolt extends fully and retracts completely.
If the lock is electronic, check power sources and function carefully. Confirm battery voltage and secure battery compartments. Cycle the lock with both local controls and any remote fobs or switches. Test signal range and response speed. For systems integrated into the vehicle electrical network, verify that the lock does not draw excessive current when idle. Check for warning lights or error codes on any control modules. If the system has programmable features, confirm that the settings match the installer’s notes. Document code programming and retain access instructions in your records.
Security verification goes beyond basic operation. Take a moment to test the lock under attempted tampering. Use light prying pressure at the seam where the door meets the frame, and check whether the lock holds firm. Try operating handles and latches from the outside while locked. The goal is not to damage the hardware, but to confirm resistance to common forced-entry methods. If the lock moves or the door yields under modest pressure, reinforce the mounting points or consider a more robust strike plate. Anti-hijack or alarm-linked features must be tested as well. Simulate a forced entry and confirm alarms trigger and any immobilizing features engage as intended.
Long-term durability starts with basic maintenance steps you perform now. Apply a small amount of high-quality lubricant to moving parts. Use a lubricant that repels water and resists attracting grit. Avoid heavy oils that collect dust. Lubricate the cylinder, latch face, and pivot points lightly. Wipe off any excess to prevent buildup. Check and remove any shavings or burrs left by drilling. Replace any threadlock or sealant that was disturbed. Ensure gaskets and seals remain flexible and fully seated. Moisture intrusion is a silent killer for locks; confirm weatherstrips and door seals compress evenly all along the perimeter.
Electrical and environmental considerations should not be overlooked. Inspect wiring runs for secure routing and proper strain relief. Wires should not rub against sharp edges or sit near heat sources. Use grommets where wires pass through panels. Secure connectors with proper clips or cable ties, keeping them accessible for future diagnostics. For electronic locks, record battery type and expected lifespan. If the lock is exposed to road salt or harsh conditions, plan for more frequent inspections and periodic cleaning.
Documentation is often undervalued but crucial. Create a concise installation record that includes the date, lock model or part number, and the installer’s name. Note torque values for any critical bolts and the alignment adjustments you made. Keep copies of keys, programming codes, and wiring diagrams with the vehicle maintenance file. Store spare keys in a secure, off-site location. If the truck is part of a fleet, update the asset record to show the new lock installation and schedule a follow-up check in 30 days.
Before declaring the job complete, run a final, realistic scenario test. Load the compartments as they will be used. Close and lock the doors, then drive a short distance over varied surfaces. On return, re-check every lock for tightness, noise, or loosening fasteners. Re-test key operation and any alarm triggers. This practical test often reveals issues that static checks miss, such as fasteners that vibrated loose or latches that shifted under load.
One final safety note: never leave spare keys in or on the truck. Also ensure no wiring or trim pieces block emergency release mechanisms. If the vehicle or locks will be used in core safety roles, arrange for a qualified technician to conduct a secondary inspection. Professional verification is especially recommended for electronic systems or when modifications affect the structural integrity of the service body.
For model-specific guidance and additional safety tips, consult the original installation reference used during the project. More detail on safe lock installation practices can be found from industry resources, such as this guide from Pacific Automotive: https://www.pacificautomotive.com
Final thoughts
Successful lock installation on your service body truck is a testament to your commitment to security and functionality. By following the steps outlined—from understanding compatibility to conducting thorough final inspections—you can confidently enhance your truck’s safety features. Remember that investing time in the installation process not only secures your equipment but also ensures peace of mind while you’re on the road.