
Servicing your own truck gives you control over reliability, safety, and repair costs that a shop schedule never will. Once you know how to service a truck at home, basic jobs stop carrying labor charges, and small problems get caught before they turn into breakdowns.
This guide covers the jobs that matter most: checking and topping off fluids, greasing the chassis and driveline, and the routine steps most owners skip. It is written for owners who would rather spend a Saturday in the driveway than a week waiting on a service bay.
Every system on your truck depends on a fluid. Engine oil, coolant, transmission fluid, differential fluid, brake fluid, and power-steering fluid all break down with heat and time, and each one protects parts that are expensive to replace. Checking them on schedule is the cheapest protection you can buy.
The same goes for grease. U-joints, tie-rod ends, ball joints, and suspension parts stay tight only as long as they have fresh lubricant. Skip them and you get squeaks first, then play, then failed components.
The “steps owners skip” tend to be the small ones: a level check, a wipe of the reservoir cap, one grease fitting tucked behind the frame. That is where premature wear starts, and no amount of careful driving undoes it.
What this guide covers:
- Fluid checks – how to inspect, top off, and replace the fluids that keep your truck running.
- Grease points – where the fittings are and how to lubricate them properly.
- Commonly skipped steps – the overlooked jobs behind most premature wear.
Why Service Your Truck at Home?
DIY maintenance pays off in a few consistent ways: lower bills, a working knowledge of your own truck, and faults caught while they are still minor. None of it is complicated. It just takes a decision to start.
Lower cost. Shop labor climbs every year, and parts arrive with a markup already included. Do the work in your own driveway and that overhead disappears. If you log serious mileage, oil changes, filter swaps, and fluid top-offs add up to real money over a single season.
Deeper familiarity with the vehicle. Every time you get under the truck you learn something. You start to notice a faint rattle, a slight pull to the right, a drip that only shows up overnight. That kind of intuition does not come from a receipt. It comes from doing the work yourself.
Faster turnaround. A service bay can cost you days you would rather spend driving. At home you decide when the work happens, so a routine check fits around your Saturday instead of a shop’s booking calendar.
Catching small problems early. A fraying belt or a slow leak is cheap now and expensive later. Regular inspections put you in front of those warnings, and that is what keeps a dependable truck dependable.
Use this table as a quick reference: where each fluid lives, what a healthy sample looks like, and how often it deserves a look.
| Fluid Type | Where to Check It | What to Look For | Typical Check Interval |
|---|---|---|---|
| Engine Oil | Oil dipstick, plus the oil fill cap | Amber to dark-brown color, level between LOW and HIGH on the dipstick, no milky or frothy texture and no burnt smell | Every fuel fill-up or weekly |
| Coolant | Coolant recovery reservoir (check the radiator only when the engine is cold) | Correct color for the fluid type (green, orange, pink or purple), level between MIN and MAX, no oily film, rust or floating debris | Monthly and before long trips |
| Brake Fluid | Master cylinder reservoir | Clear to light amber; dark, black or gritty fluid means it is overdue; level between MIN and MAX with no drop over time | Every 6 months or at each oil change |
| Transmission Fluid | Transmission dipstick or check/fill plug (consult your manual) | Reddish-pink and clean; brown, black or burnt-smelling fluid signals heat damage; level reading on the HOT marks with the engine running | Every 30,000 miles or per the owner’s manual |
| Power Steering Fluid | Power steering fluid reservoir | Light amber to clear or pink; dark, burnt-smelling fluid is a warning sign; level between the HOT and COLD marks | Every 6 months or at each oil change |
| Differential Fluid | Fill plug on the differential housing | Amber-to-brown gear oil that weeps at the fill-hole level; watch for metal shavings, milky texture or a burnt smell | Every 30,000 to 60,000 miles |
| Windshield Washer Fluid | Translucent washer fluid reservoir | Level between MIN and MAX; use freeze-protected fluid rated for your local winter temperatures | Monthly or whenever the low-fluid light appears |
Step 1: Engine Oil – The Most Important Fluid Check
If you only do one job, do this one. Oil lubricates, cools, and cleans every moving part inside the engine, which is why it anchors any fluid-check routine. The process, start to finish:
-
Park on level ground. Roll onto a flat surface and shut the engine off. A sloped driveway tilts the oil pan and gives a false reading, so level ground is not optional.
-
Let the engine cool. Wait 10 to 15 minutes so the oil drains back down into the pan. Checking a hot, running engine risks burns and throws off the measurement.
-
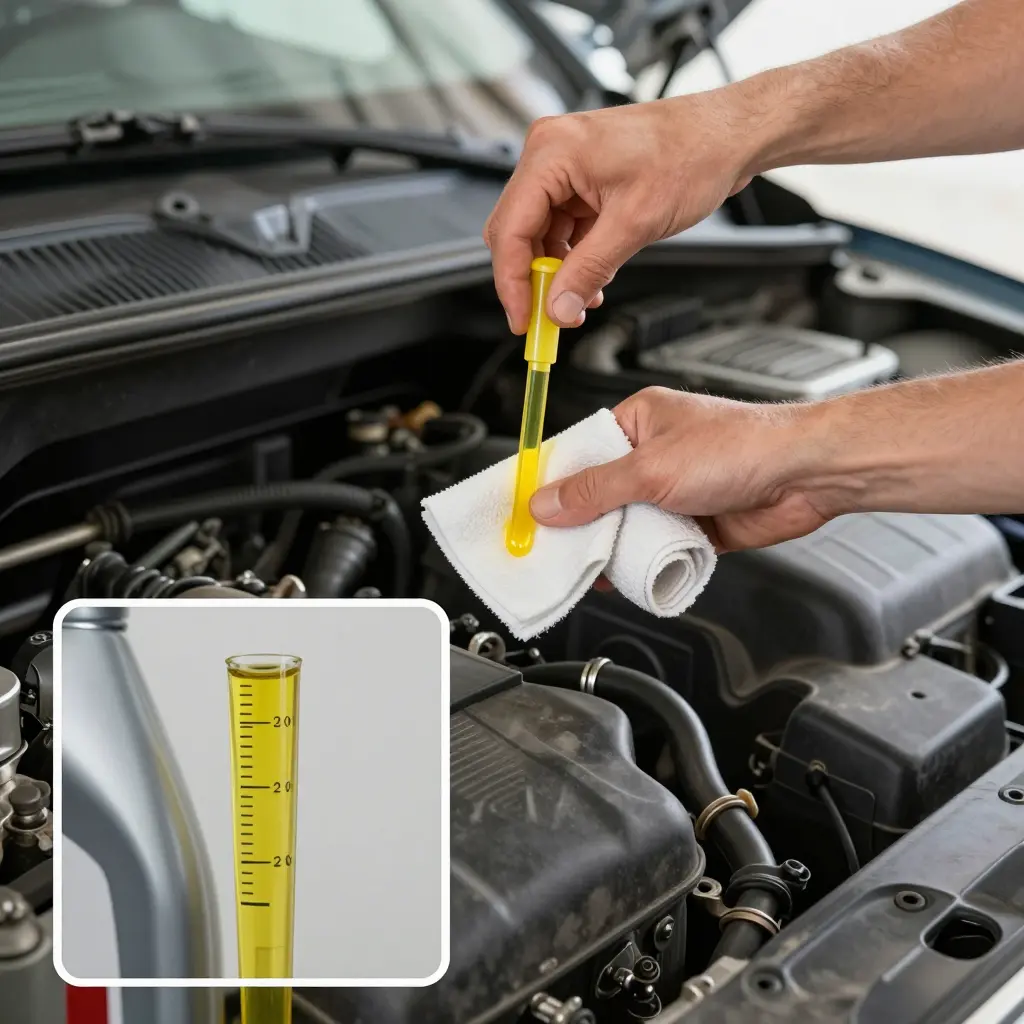
Pull the dipstick and wipe it clean. Remove the dipstick-usually marked by a bright loop or yellow handle-then wipe it with a lint-free rag to strip away the old film.
-
Reinsert it fully. Push the dipstick all the way back in, then pull it out again to capture a fresh, accurate sample.
-
Read the level against the marks. The oil line should fall between the low and full marks, or inside the crosshatch area. If it sits at or below the low mark, add oil a little at a time and re-check.
-
Assess color and texture. Fresh oil is amber and smooth. Dark oil late in an interval is normal. Milky or frothy oil can mean coolant is mixing with the lubricant; gritty oil points to internal wear or contamination. Either one is worth investigating before a small problem becomes a rebuild.
Checking oil properly takes five minutes and catches expensive problems early. Do it along with the other fluid checks and you stay ahead of the failures that park a truck.
Step 2: Coolant and the Cooling System
Coolant does more than keep the engine from overheating. It holds operating temperature steady, carries heat away from the combustion chambers, prevents corrosion inside the block, and keeps the system from freezing in cold weather. It is also one of the easiest systems to inspect at home, as long as you respect the safety rules.
Safety-Critical Warnings
- Never open the radiator cap while the engine is hot, or even warm. The system is pressurized, and scalding coolant can erupt without warning.
- Let the engine cool completely, ideally for at least an hour, before you loosen the cap.
- Remove the cap in two stages: press down, turn just to the first stop to let pressure escape, pause, then open fully.
- Wear safety glasses and gloves, and keep your face and hands away from the filler neck.
- Never pour cold coolant into a hot engine. Thermal shock can crack a head or block.
- Old coolant is toxic. Catch it in a drain pan and recycle it properly, never down a drain.
Checking the Reservoir
Start with the translucent overflow reservoir. With the engine cold, the level should sit between the MIN and MAX (or COLD and FULL) marks molded into the side. This is the easiest and safest place to run a routine coolant level check. If it reads low with no visible leak, top it up with a pre-mixed 50/50 blend so you do not dilute the system.
Checking the Radiator
Once the engine is fully cool, remove the cap and look inside the filler neck. Coolant should be visible close to the top. If the level is low, the reservoir was not the whole story, and you likely have a leak or trapped air. Fill slowly and watch for steady bubbling, which can signal a head gasket or combustion leak.
Judging Coolant Condition and Concentration
Fresh coolant looks clear and brightly colored. Rusty, oily, muddy, or cloudy fluid, or fluid with floating debris, means it is time to flush the system. Test concentration with a hydrometer or refractometer; a 50/50 mix of coolant and distilled water is the standard recommendation.
| Coolant Concentration | Freeze Protection | Boil Protection |
|---|---|---|
| 30% | -15 F (-26 C) | 220 F (104 C) |
| 40% | -24 F (-31 C) | 224 F (107 C) |
| 50% | -34 F (-37 C) | 227 F (108 C) |
| 60% | -62 F (-52 C) | 230 F (110 C) |
| 70% | -67 F (-55 C) | 234 F (112 C) |
Hoses, Leaks, and the Right Color
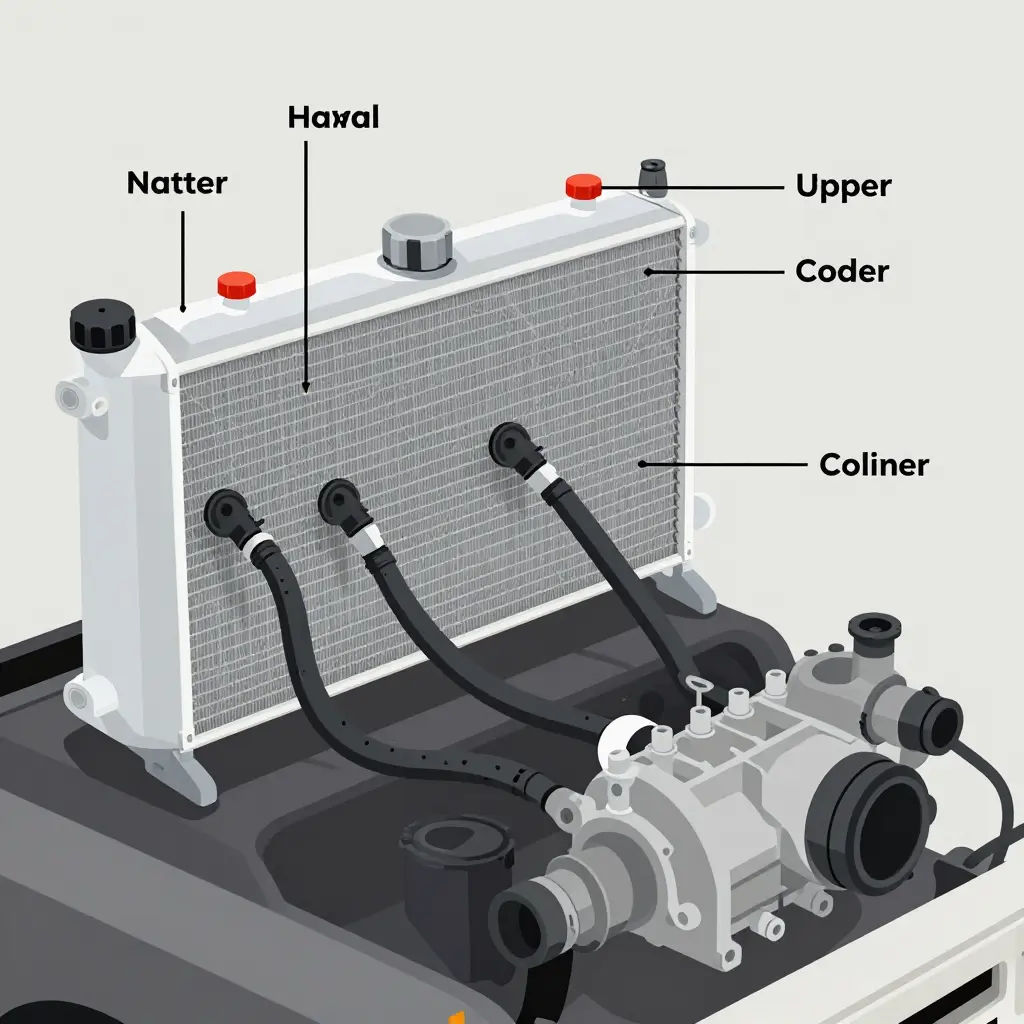
Squeeze the upper and lower hoses when the engine is cold. They should feel firm but flexible, with no cracks, soft spots, or bulges. Inspect the radiator fins and seams for crusty white or colored residue – dried coolant, and a reliable sign of a small leak.
Finally, confirm the correct coolant type for your truck. Most modern trucks use OAT or HOAT formulas in specific colors, and the color often signals the chemistry rather than the brand. Mixing incompatible types can cause the coolant to gel and clog the system. When in doubt, consult your owner’s manual, or explore professional maintenance training resources to build your skills with confidence.
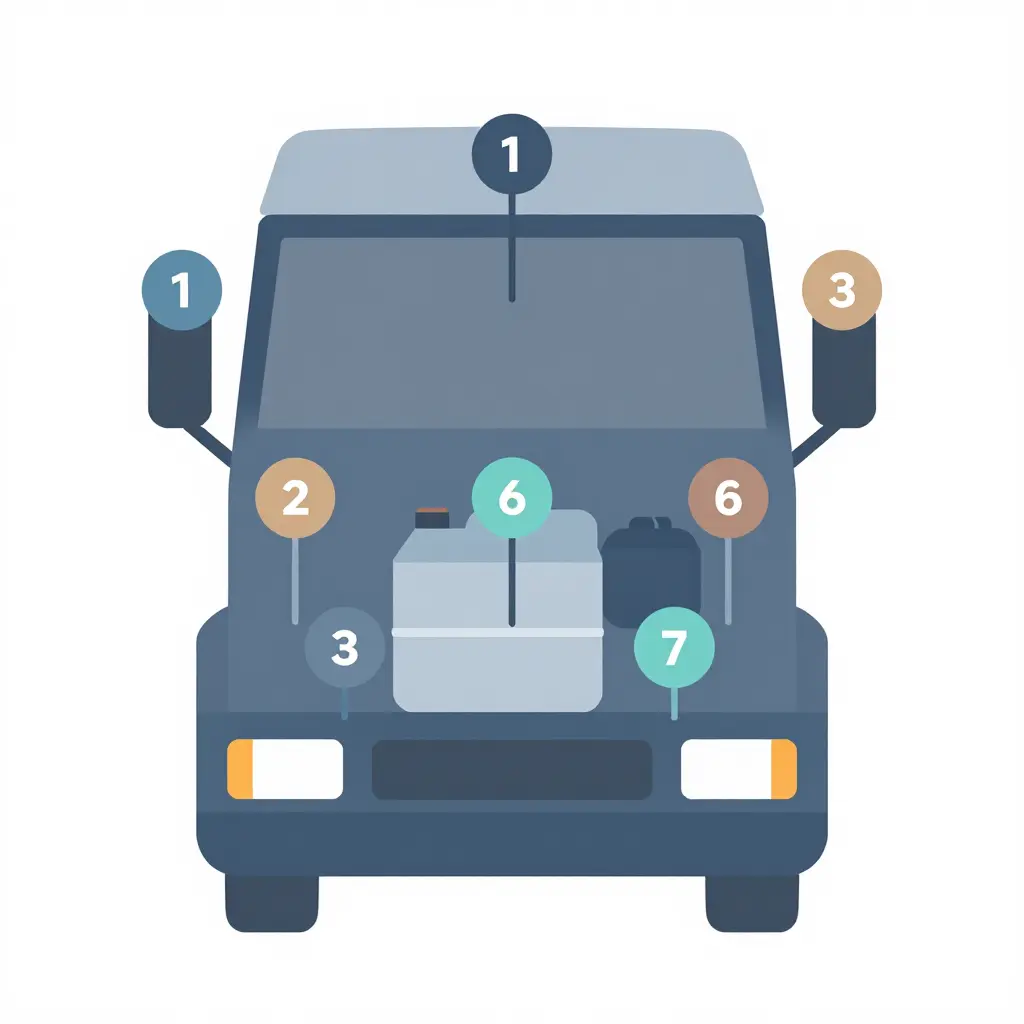
The diagram above shows a typical truck engine bay from overhead, with six numbered callouts marking the main fluid checkpoints: engine oil dipstick, coolant reservoir, brake fluid reservoir, power steering reservoir, transmission dipstick, and washer fluid. Learn the layout once and you can find any of them at a glance before you pop the hood.
Step 3: Brake Fluid and Transmission Fluid
Brake fluid carries every pound of stopping force your truck produces, and it is one of the most ignored fluids under the hood. For a brake fluid check, find the translucent reservoir on the firewall, usually marked with a brake symbol. The level should sit between the MIN and MAX lines. If it keeps dropping, you have a leak to chase down.
Color tells a second story. Fresh fluid is nearly clear or pale amber. Dark, murky, or coffee-colored fluid is contaminated and needs to be flushed. Moisture is the real problem here: brake fluid is hygroscopic, meaning it absorbs water from the air over time. That water lowers the fluid’s boiling point, so hard braking can vaporize it and leave you with a spongy, unreliable pedal. In a safety system, that is a risk you never accept.
Checking automatic transmission fluid follows a different routine. Many manufacturers require the engine at operating temperature and the truck level, so read your owner’s manual before you start. The steps:
- Park on level ground and let the engine reach normal operating temperature.
- With the engine running and your foot on the brake, cycle the shifter slowly through each gear, pausing a few seconds in each.
- Return to Park, then pull the dipstick, wipe it, reinsert it, and read the level.
- Check the color and smell: healthy fluid is reddish and clean, while burnt or gritty fluid means service is overdue.
A transmission fluid check sounds simple, but getting the temperature and gear-cycling steps right is what separates a real reading from a misleading one.
Expert Cautions
Never mix fluid types. DOT 3, DOT 4, and DOT 5.1 differ chemically, and silicone-based DOT 5 must never touch a system built for glycol fluids. The same rule applies to transmission fluid: use only the exact specification your manufacturer lists. Wrong or mixed fluid damages seals and valves fast. When in doubt, consult the owner’s manual before you top off a single ounce.
Step 4: Differential Fluid and Power Steering Fluid
Two fluids that almost never get checked during a routine oil change are the differential fluid and the power steering fluid. Neither has a handy dipstick, neither leaks enough to grab your attention, and nothing on the dashboard lights up when they run low. That silence is why both checks deserve a permanent spot in your service routine.
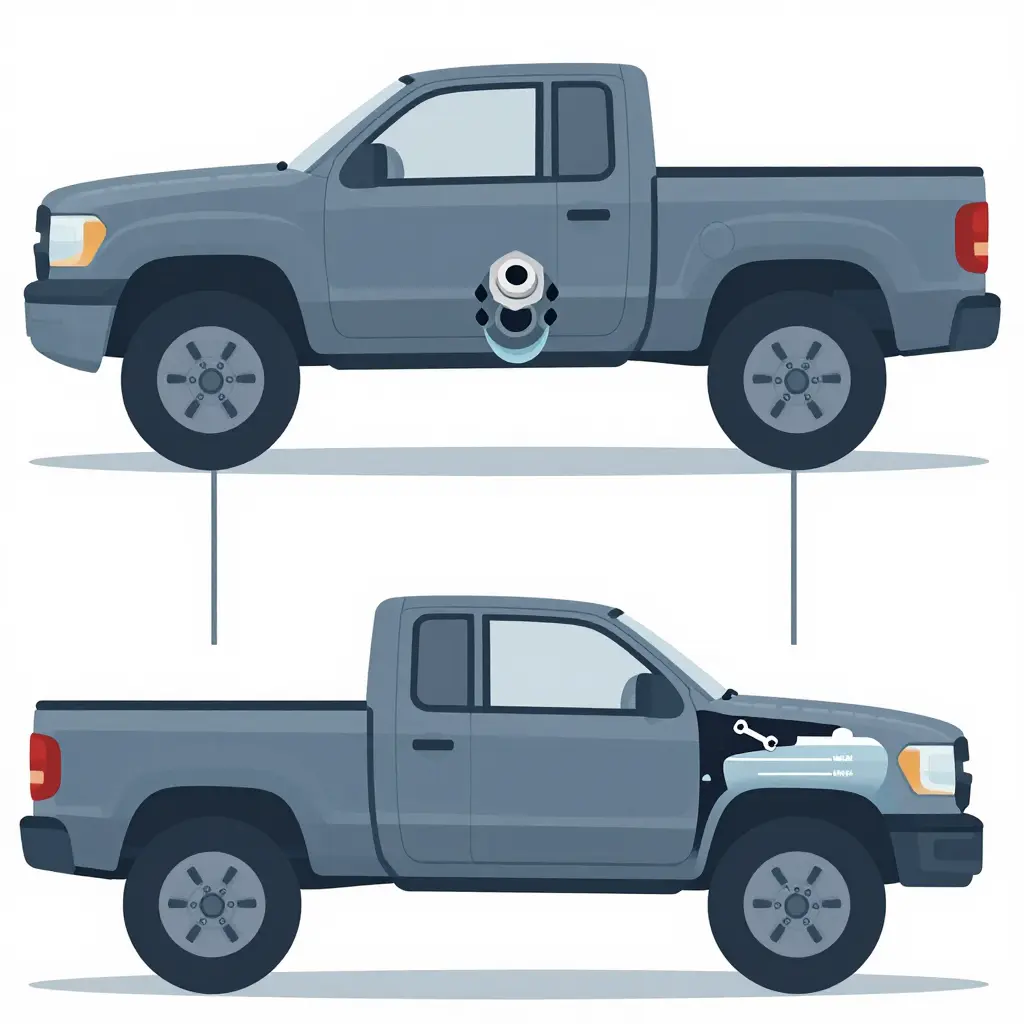
Differential Fluid Check: Front and Rear
Your truck has a rear differential, and four-wheel-drive models add a front one as well. Each is a sealed gear case holding its own supply of oil. Find each by following the driveshaft to the bulging “pumpkin” at the center of the axle.
- Front differential: look between the front wheels, behind the bumper and under the engine crossmember.
- Rear differential: the round housing at the center of the rear axle, under the bed.
- The fill plug: usually a 3/8-inch square-drive plug or a large hex bolt set partway up the housing. Do not confuse it with the plug at the very bottom, which is the drain.
Clean the area around the plug, then loosen it with a ratchet. With the truck parked level, the correct level is right at the bottom edge of the fill hole. Slide a finger or a bent zip tie inside; fluid should be level with the hole or just weeping out.
Why level with the fill hole? The fill hole is the manufacturer’s built-in dipstick; its bottom edge marks “full.” Too little fluid starves the gears and bearings and cooks them, while too much fluid foams, builds pressure, and pushes past the seals, causing a leak that starts the whole problem over.
Spotting a leaking seal
- Fresh, dark, oily streaks or drips around the pinion, axle tubes, or cover gasket.
- A thick ring of grime (gear oil plus road dust) caked around a seal lip.
- Fluid sprayed on the underside of the bed or on the inner wheels.
- A growing puddle after the truck sits overnight, often with a sharp sulfur smell.
Power Steering Fluid Check
Power steering is easy to overlook because it fails gradually. With the engine off and the truck on level ground, open the reservoir cap (some have a built-in dipstick) and read the fluid against the HOT or COLD marks. Most systems want the fluid near the top of the HOT band once warm, and you should top off only with the fluid your owner’s manual specifies, typically ATF or dedicated power steering fluid. Never mix them.
Watch for these warning signs:
- Whining, groaning, or a buzzing noise when you turn the wheel, especially when cold.
- A stiff, jerky steering feel, or steering that gets heavier at low speed.
- Dark, burnt, or milky fluid; a metallic sheen or grit means internal wear.
- Foaming or bubbles in the reservoir after a drive.
A failing pump usually announces itself with a persistent whine that tracks engine speed and grows louder when you turn. If the fluid is dark, the whine stays constant, or steering effort keeps changing, the pump or steering rack is on the way out and should be diagnosed before it leaves you without assist.
When Do These Fluids Actually Need Changing?
Manufacturers call some of these fluids “lifetime,” but working technicians rarely agree. Heat, towing, hauling, and water intrusion all shorten their useful life, and this is where good maintenance pays off by keeping your rig reliable on the road.
- Differential fluid: change every 30,000-60,000 miles in normal use, and far sooner (often 15,000-30,000 miles) if you tow, haul, or ford water, since moisture turns gear oil milky and gritty.
- Power steering fluid: flush every 50,000-100,000 miles, or sooner if the fluid darkens. Fresh fluid is cheap insurance against a pump or rack replacement.
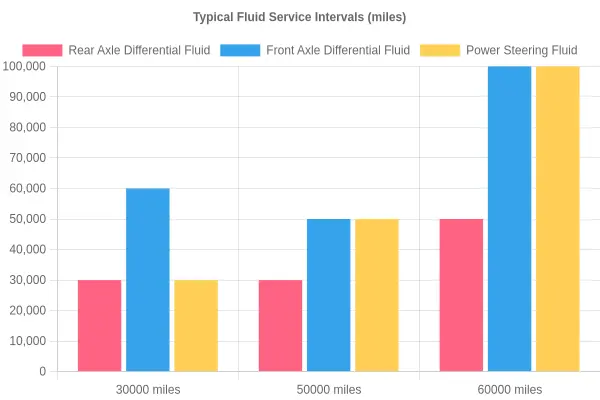
| Fluid | Where to check | Typical interval | Key warning sign |
|---|---|---|---|
| Rear differential | Fill plug on rear axle housing | 30,000-60,000 miles | Grime ring around a seal |
| Front differential | Fill plug between front wheels | 30,000-50,000 miles | Fluid sprayed under the bed |
| Power steering | Reservoir cap in engine bay | 50,000-100,000 miles | Constant whine when turning |
Checking these two fluids takes about ten minutes, but skipping them can quietly cost you a differential rebuild or a new steering pump. Make them part of every oil-change routine and you will catch trouble while it is still a cheap top-off.
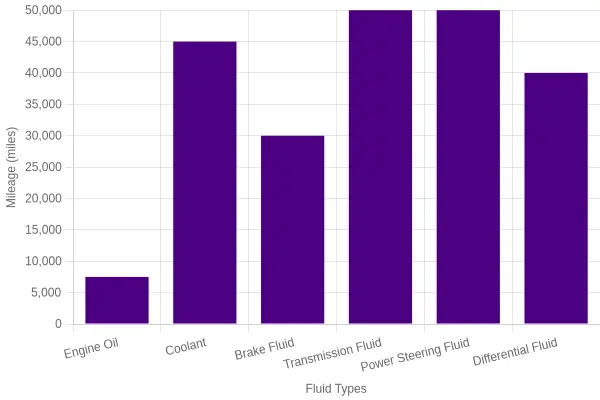
This bar chart compares typical service intervals by mileage for the six fluids your truck relies on: engine oil, coolant, brake fluid, transmission fluid, power steering fluid, and differential fluid. Note that exact intervals vary by manufacturer and should always be confirmed in your owner’s manual.
The chart makes one thing immediately clear: no two fluids live on the same schedule. Engine oil sits at the low end because it works under constant heat and contamination, which is why it demands the most frequent attention of any fluid on your truck. Coolant, transmission fluid, power steering fluid, and differential fluid stretch much further out, a handy visual reminder that a “one-size-fits-all” maintenance calendar simply does not exist for a truck.
Use these bars as a planning baseline, not a rulebook. Your driving conditions – heavy towing, stop-and-go traffic, dusty job sites, or extreme cold – can shorten any of these intervals significantly. When in doubt, trust the severe-service schedule in your manual over the standard one.
Step 5: Grease Points – Where Most Owners Fall Short
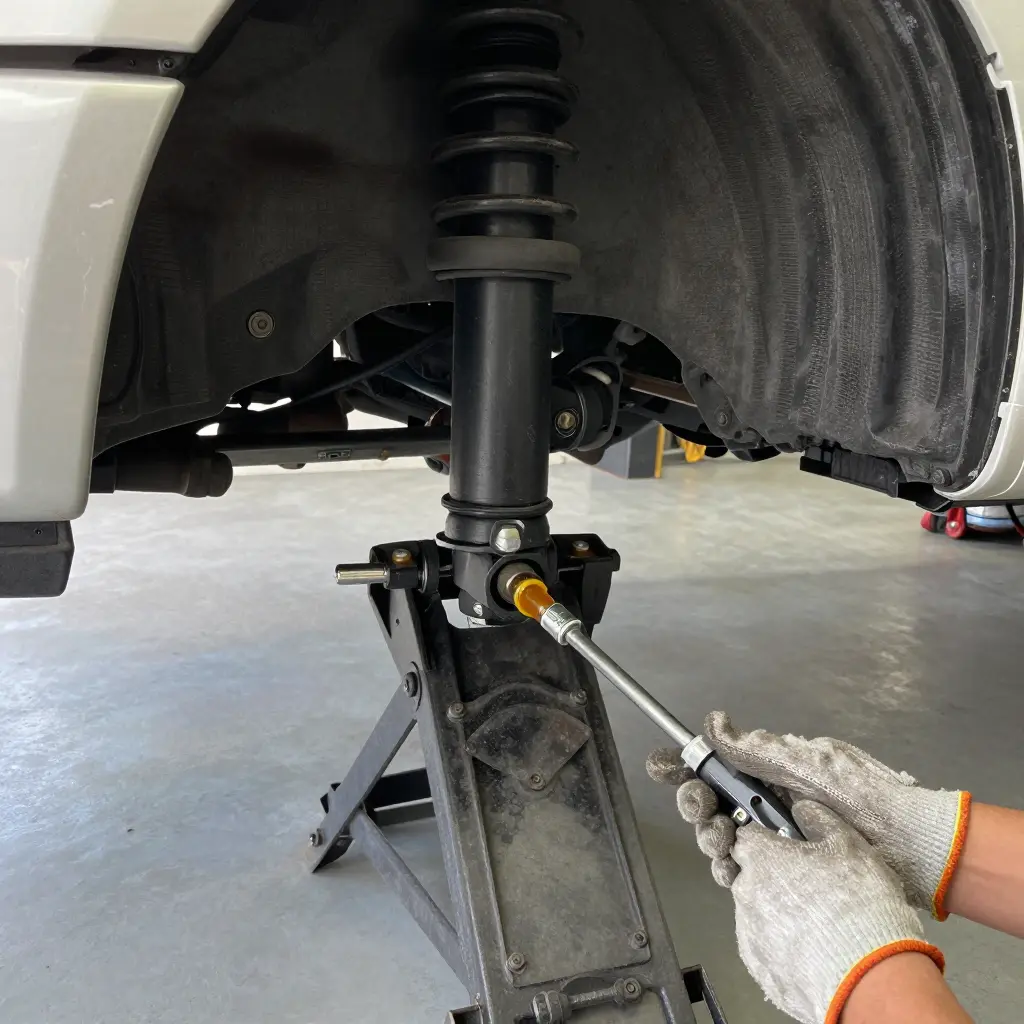
Chassis lubrication is what keeps a truck tight over the long haul. Every bump you roll over, every time you crank the wheel, dozens of metal-on-metal joints flex, pivot, and grind against each other. Grease points are the small, spring-loaded Zerk fittings pressed into those joints – the little nozzles where you pump fresh lubricant to flush out water, grit, and old, broken-down grease. Factory fillings keep things quiet for a while, but they dry out, wash away, and trap contaminants over time. That is why truck grease points are among the most skipped items in any home service routine. Learning how to grease a truck properly takes about twenty minutes and costs almost nothing, yet it can add tens of thousands of miles to your steering and driveline components.
Where the Grease Fittings Live
Grab a flashlight and a rag, crawl underneath, and locate each of these before you reach for the gun. Here are the fittings you will typically find under a full-size truck:
- Tie rod ends (inner and outer)
- Ball joints (upper and lower, where fittings are present)
- Idler arm and Pitman arm
- Drag link and center link
- Driveshaft universal joints (U-joints)
- Slip yoke on the driveshaft
- Sway bar end links and bushings
- Control arm bushings (on serviceable designs)
- Leaf spring shackles and hangers
- Steering stabilizer (if fitted)
The Steering and Front-End Joints
The tie rod ends and ball joints carry the brunt of the load. They pivot constantly as you steer, and a dry ball joint can fail suddenly, so this is the group worth checking first. The idler arm and Pitman arm translate your steering input into motion at the wheels – they flex with every turn and quietly collect road spray. Because these joints sit low and forward, they are the first to lose their grease film and start rattling. A quick, firm pump at each fitting keeps the steering tight and the front end planted.
The Driveline and Suspension Points
Moving rearward, the driveshaft U-joints and slip yoke deserve equal attention. These spin thousands of times per mile, and a dry U-joint will chirp, clunk, and eventually seize. The slip yoke lets the shaft change length as the suspension moves – it needs grease to slide smoothly instead of binding. On the suspension side, sway bar links, control arm bushings, and leaf spring shackles handle every pothole. Servicing these keeps the ride composed and prevents the suspension from developing hard-to-diagnose noises.
Using the Grease Gun the Right Way
Clamp a lever or pistol-grip gun onto each Zerk fitting so it seats squarely – a crooked coupler will squirt grease everywhere but inside the joint. Pump slowly, two to three strokes at a time, and watch the joint. You have done the job correctly when you see fresh grease pushing through: new, clean amber lubricant should ooze past the boot seal or out of an overflow channel, carrying the old, contaminated grease with it. What comes out should look different from what you are pumping in. If nothing emerges, the fitting may be clogged or the joint may already be dry-seized – clean or replace the Zerk and try again.
Don’t Over-Grease Sealed Components
The most common mistake is forcing grease where it does not belong. Sealed, maintenance-free components – many modern sealed ball joints, sealed U-joints, and sealed hubs – have no fitting precisely so they stay closed. There is nothing to pump into, and adding pressure through a boot can rupture the seal and let water in. Even on serviceable joints, stop the moment fresh grease appears; over-greasing balloons a rubber boot until it splits, which does more harm than skipping the job. Wipe off any excess when you finish so the fitting stays clean and easy to find next time. Keep this step consistent and the steering, driveline, and suspension run quiet for thousands of miles.
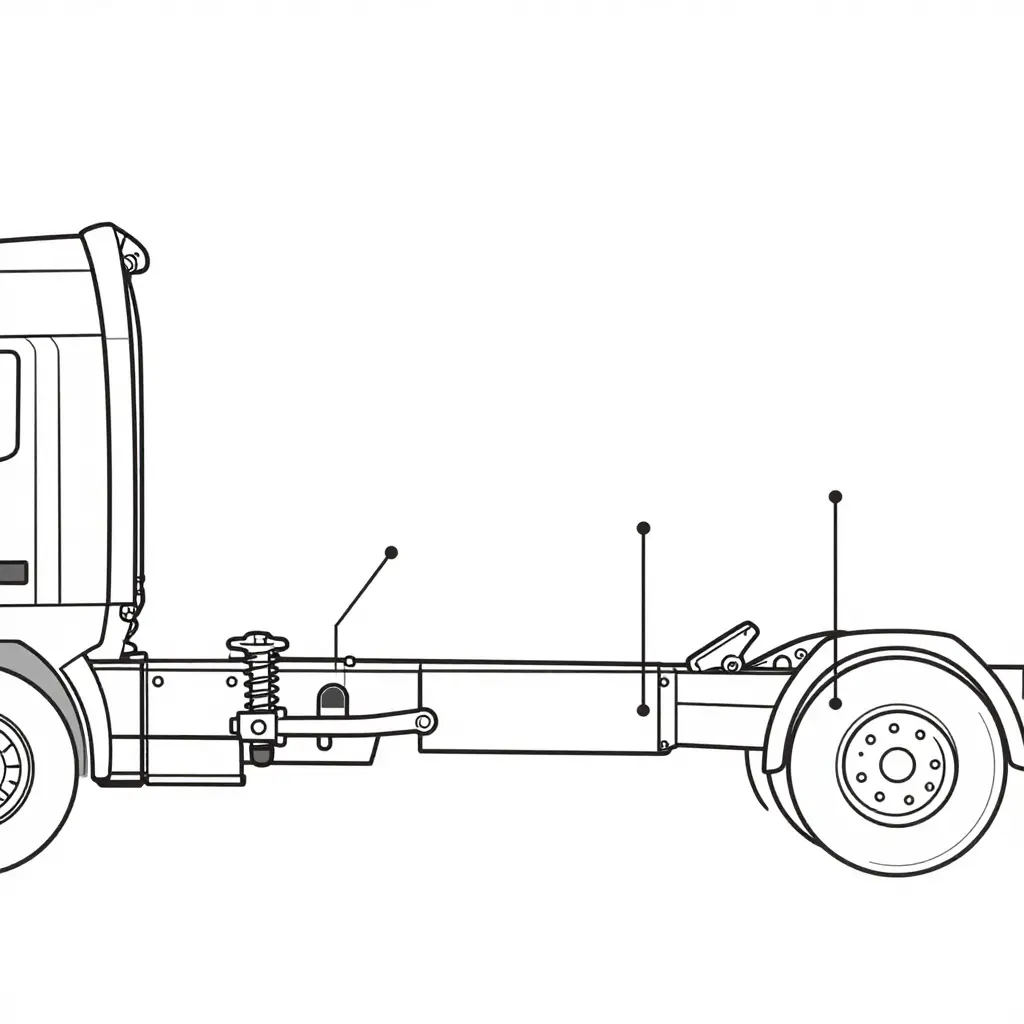
The diagram above maps the underside of a generic truck chassis and flags every spot that takes a shot of grease. Each callout dot points to one of these service points:
| Callout Location | Component | Why It Needs Grease |
|---|---|---|
| Front left | Tie rod end | Steering wear point, dries out fast |
| Front right | Ball joint | Loads and pivots with every turn |
| Steering box | Pitman arm | Transfers steering input, high friction |
| Steering box | Idler arm | Supports the drag link, ignores it and steering wanders |
| Center underbody | Driveshaft U-joints | Spins constantly under load |
| Rear axle | Suspension pivot points | Flexes over every bump and pothole |
Match these zones to your own truck: crawl underneath with a flashlight, follow the same shapes, and confirm each fitting before you pump. Some newer trucks ship with sealed, non-greasable joints, so if you do not find a Zerk fitting at a location shown here, that point is maintenance-free by design.
The Steps Owners Skip (And Why It Costs Them)
Every home maintenance routine has its satisfying jobs: draining the oil, swapping a filter, topping off the washer fluid. Reliability, though, is built in the tasks nobody enjoys. Experienced technicians will tell you the skipped steps are almost always the same handful – and they are the ones that turn a cheap fix into a roadside breakdown.
Home maintenance rewards consistency, not heroics. Skip a five-minute inspection today and tomorrow you may be paying for a tow, a ruined battery, or a burned-up transmission.
The spare tire and its pressure. The spare is the most forgotten tire on the truck because it never rolls. Spares routinely turn up inflated well below spec, with rubber that has quietly aged out. When you finally need one after a blowout, a flat, cracked spare leaves you stranded, often in the worst possible spot. Check it monthly.
Belts and hoses. These often fail with no obvious warning. A serpentine belt can look fine on top and be glazed and cracking underneath; when it snaps, you lose the alternator, water pump, and power steering at once. Hoses swell and soften from the inside, and a burst radiator hose can warp a cylinder head within minutes of overheating.
The battery and its terminals. Many owners check voltage but never clean or protect the terminals. Corrosion and loose clamps add resistance, which works the alternator harder and leads to no-start mornings. A few minutes on the terminals now beats a midwinter failure and a new alternator later.
Differential and transfer case fluid. The “lifetime fluid” claim does the most damage here. Differential and transfer case fluid degrades with heat and towing, and contaminated fluid grinds gears and bearings. A differential replacement costs thousands; new fluid costs about the price of two oil changes.
Cabin and engine air filters. A clogged engine air filter costs power and fuel economy, and a dirty cabin filter pushes allergens and moisture into the HVAC system. Both are cheap, fast, and easy to postpone – and both protect expensive parts downstream.
Brake and suspension components. Pad thickness is easy to see. Calipers, brake lines, ball joints, tie rods, and bushings are not. Worn suspension accelerates tire wear and makes braking less stable, and a seized caliper can overheat and warp a rotor. Catching these early is a safety matter as much as a cost one.
When a job is beyond your comfort zone, quality service and reliability on the road start with knowing when to hand it off. Professional truck maintenance and service training also sharpens a DIY owner’s eye for the details that matter.
Keep this checklist on the garage wall and work through it at every service interval:
- [ ] Spare tire: pressure, tread, and age
- [ ] Serpentine and accessory belts: cracks, glazing, tension
- [ ] Coolant and heater hoses: soft spots, swelling, leaks
- [ ] Battery terminals: clean, tight, and protected
- [ ] Battery load test every six months
- [ ] Differential fluid: level and condition
- [ ] Transfer case fluid (4WD): level and condition
- [ ] Engine air filter: inspect and replace
- [ ] Cabin air filter: inspect and replace
- [ ] Brake pads, rotors, lines, and fluid
- [ ] Ball joints, tie rods, and bushings
Each item is small on its own. Together, the steps owners skip are the difference between a truck that starts every morning and one that surprises you at the worst moment. Get them right and home maintenance stops feeling like a gamble.
Frequently Asked Questions About Servicing a Truck at Home
How often should I check my truck’s fluids?
Engine oil should be checked at every fuel stop or weekly, and washer fluid monthly. Coolant wants a monthly look, plus a check before any long trip. Brake and power steering fluid are easy to inspect at each oil change, and transmission and differential fluid follow the mileage intervals in the tables above. Consistency matters more than perfection; a five-minute glance under the hood on a Sunday morning will save you a roadside breakdown later.
Can I change my own oil, or should I leave it to a shop?
Most DIY owners can change their own oil with ramps or a jack, a drain pan, a wrench, and a new filter. It is one of the most beginner-friendly jobs, and a good way to learn your engine bay. Confirm the oil weight and filter part number, torque the drain plug, and take the used oil to a recycling center. If the truck is still under warranty, keep receipts and notes to protect your coverage.
How do I know when my grease points need attention?
Grease points want fresh lubricant when you hear squeaks, feel stiffness in the steering, or reach the scheduled interval, often every 5,000 to 10,000 miles. Look for dried or cracked grease around the fittings, then pump until new grease pushes out at the joint. The hidden zerks on tie rods, ball joints, and driveshafts are the ones owners miss, so keep the grease gun handy at every oil change.
Is it safe to check transmission fluid at home?
On a truck with a dipstick, yes – as long as the engine is warm, the truck is level, and the transmission is in park or neutral as your manual specifies. Fluid that looks dark, smells burnt, or contains grit points to trouble. A sealed transmission with no dipstick is best left to a shop, since checking the level usually takes special tools and a temperature reading.
What tools are essential for a DIY truck owner?
A starter kit should include a socket set, torque wrench, jack and jack stands, drain pan, funnel, grease gun, filter wrench, and a decent multimeter. Add a code reader for warning lights, plus gloves and safety glasses. You do not need it all at once: buy good tools as jobs require them and keep them in a labeled box so a service session stays quick.
How do I know when a task should go to a professional?
Hand off internal engine or transmission repair, airbag or brake-system electronics, and any job that needs a lift and specialty software. If you lack the tool, you are unsure about torque specs, or you cannot explain what you are seeing, stop. Handing off a complex repair is good judgment, not a defeat. When a job exceeds your skill set, explore trusted truck service and reliability to get back on the road safely.
Staying Ahead of Truck Maintenance
You now have a working routine for keeping the truck healthy without ever handing over the keys. Staying ahead of maintenance comes down to consistency: check fluids on schedule and top off what runs low, work through every chassis grease point until fresh grease pushes out, and stop skipping the jobs most owners shrug off. Those small tasks are what quietly shorten a truck’s life.
The payoff is real. Home service trims labor costs and shop markup, and steady attention protects the parts that keep you rolling. It’s the same discipline that separates a dependable truck from a breakdown-prone one, and it only comes from taking care of your own equipment over the long haul.
What to do next:
- Check fluids on a set schedule – engine oil, coolant, brake fluid, power steering, transmission, and differential, topping off and noting any drop that hints at a leak.
- Grease every chassis grease point – hit ball joints, tie rods, U-joints, and suspension fittings until old grease is pushed out and replaced with fresh.
- Tackle the steps owners skip – the filters, belts, hoses, and quick inspections that are easy to postpone but costly to ignore.
- Log every service – date, mileage, and what you did, so patterns and early warning signs surface before they become repairs.
- Keep sharpening the craft – structured maintenance training matters in a driveway as much as in a fleet.
Maintenance rewards the patient and the consistent. Keep your tools organized, treat each check as part of the job rather than a chore, and pay attention to what the truck is telling you. Stay ahead of the small stuff and it will keep answering the call, mile after mile.